
Originally written by Jan Labanowski (jkl at ccl dot net), Computational Chemistry List, Ltd on Jan 12, 2015.
Click on images to get the original size screen dump.
This is not an organized tutorial or an overview. This is just a brain dump that lists some approaches to run Vagrant under Cygwin on Windoz that I used over time. You may learn a lot, if you did not do Vagrant and Cygwin. My primary goal is to take the fear from trying Vagrant. If you follow the instructions, you will not be surprised or stuck since I provide a lot of details. If you are an expert, do not bother reading by this point. If you liked it, make a link to it on your site, or mention it in some blog, so more people have a chance to read this thing.
This write-up is specifically for using Vagrant and VirtualBox with Cygwin and Windows7. The keyword here is Cygwin, a Unix type environment under MS Windows. I love Cygwin since it helps me keep my sanity when I work on Windoz (I worked mostly with Unix/Linux). It can help you too, if you think that Linux/Unix is a better development environment than Windoz. VirtualBox is a software that runs a Virtual Machine inside your host operating system (here Windoz). The Vagrant is the tool that lets you interact with VirtualBox in a consistent way through simple command line instructions.
Vagrant is hyped a lot, but it is extremely useful. It was released in 2010 and is still under active development and hard to chase. You could call Vagrant a Virtual Machine Manager. It provides you with an easy way to run a Virtual Machines of your choice inside the host operating system, like running a Linux guest inside Windoz host. It also provides an easy (easier, this stuff is not easy) way to configure them. There are some competitors, but Vagrant gives you a lot of flexibility to create tailored and highly customized guest systems (this is called provisioning). Moreover, you can run several of these guest systems inside your host machine (of course, you will need memory and processor power) and mimic your production environment, like database server, web server, code repository, etc.) with their respective versions of operating systems, installed software and custom packages. It is especially useful to model accurately your production environment within your Desktop PC. You do not need a separate development servers, development databases, etc., and compete with other members of your team for resources. You cannot mess up anything inside your company servers (unless you try really hard), and if something did not work, you can easily destroy these guest systems and start from scratch. You can run these things inside your laptop and work from home without being affected much by the speed or security of the network. Of course, creating the fairly accurate rendition of your existing production environment may require some practice and experience with the provisioning frameworks like Puppet and/or Chef. Learning these things is a good investment, since creating a box, after you provisioned it, takes minutes, and you can modify the current box by tweaking a few lines. After writing the recipes (provisioning scripts) that create the guest boxes each time in exactly the same way, you can share it with your team. Of course, you can also modify the box provisioned by someone else. But you can start modestly.
You do not have to be an eagle to run Linux inside your Windoz, since the default Vagrant installer comes preconfigured with the Ubuntu guest that will run within the Windoz host and you can be up and running within an hour (they say minutes, but trust me, an hour). Yes, you could do it without Vagrant but you would really have to know intrinsics of the utility (in our case the VirtualBox from Oracle) that runs these guest Virtual Machines on your host.
Not so long ago, the Vagrant, Cygwin and Git did not play together, since Vagrant was installed with Ruby Rails and Git was also installed on Windows with Ruby Rails. And you had a problem with using them from Cygwin. I am not a great admirer of Ruby and its siblings. This environment is quite unstable since there are too many cooks. But maybe there is no other alternative at this point (but IMHO there is: Java). The problem is that Windoz is a strange Operating System. The file paths are represented in Cygwin and the Windoz differently. The guys who developed Unix were savvy computer scientists, and they knew that directories on the disk need to be organized as topological tree. This structure is easy to traverse back and forth and can be efficiently searched with a binary search. The people who hacked the MS-DOS and Windoz out of the CP/M were para-legal students and came up with disk drive letters (remember the, A:, B:, C:. Everyone knows A, B, C... so it seemed familiar to them). Now they are stuck with the backward compatibility and inefficient file system.
I like Cygwin (http://www.ccl.net/cca/software/UNIX/cygwin/index.html) since I am forced to work on Windoz PCs when doing contracts and Windows is (in my humble opinion) the most terrible environment for software development. Maybe Windows for Dummies is great, but for software developers that develop software for real operating systems, it is a nightmare. Moreover, the User Interface is for aliens with 3 hands (I was an alien in a sense of the US Immigration Laws, before I became a US Citizen, but I never had 3 hands...) and my fingers hurt. I am sure people are getting the carpal tunnel from using Windows. The X-Window interface (see: Project Athena for some history and to realize that it could have been better) was created to be optimal. The Windoz interface was created to be different, not better. Marketeers will swamp us with trash, and the uninformed public will buy the trash. It is not only Windows... Remember triple clicks with one-button mouse from Apple? They will do anything to be different and claim that they discovered something new. And we will buy the crud. Amazing...
Before I installed Vagrant and VirtualBox, I installed emacs on Windows7 using the HOWTO at: http://www.claremontmckenna.edu/pages/faculty/alee/emacs/emacs.html. While I have Cygwin installed and I have emacs there, I have to shut Cygwin down when I am installing new Cygwin packages. it is not a good idea to install new packages for Cygwin when it is running, and the other emacs is good to have.
There are tons of write-ups on Vagrant installations, and I will list those that I saw towards the end of this doc. But many of them are quite obsolete at this moment. The latest Vagrant does not use Ruby Rails for installation. It helps. They also did not target compatibility with Cygwin in the earlier releases, but now many earlier bugs are fixed. So, most of the stuff that I wrote below is based on the instructions from Vagrant site: https://docs.vagrantup.com/v2/installation/ and some ideas also came from the Linux Journal http://www.linuxjournal.com/content/vagrant?page=0,1 and http://www.linuxjournal.com/content/introducing-vagrant?page=0,1. The Linux Journal explain well why you need Vagrant and present nicely what else you can do with it. BTW, subscribe to the Linux Journal. It is inexpensive and these guys have to make a living too so you get good overviews and hints. I also ran into a good post at: http://shreekantranade.blogspot.com/2014/10/vagrant-virtual-box-cygwin-rvm-ruby.html, but read my stuff first, and then seek additional knowledge.
My idea how to approach the Cygwin/Windoz path disparity is to realize that when you work under Cygwin, you have essentially two HOME directories. One is obviously the Cygwin's Unix-like $HOME directory for each user. It is usually placed under top /home directory. In my case, it is /home/jkl that on the Windows is located in C:\cygwin64\home\jkl, since I installed Cygwin under C:\cygwin64 (you can read my notes on Cygwin installation at: http://www.ccl.net/cca/software/UNIX/cygwin/index.html). But Windoz also has a pseudo HOME that is called. USERPROFILE and in my case it is located at C:\Users\jkl. Many programs that run under Cygwin, but were designed primarily for Windoz get confused, since they look at HOME and USERPROFILE and do not know what to do. So generally for those confused creatures, I create links from the Cygwin $HOME directory to the $USERPROFILE directory. So they can take any of them and will end up in the right place. You will see it in action soon. The people at Windoz did not offer Unix type links for a long time, but gave us shortcuts. Note, shortcuts are not links. Very different things... shortcuts were good for Windoz, since they were incompatible with other operating systems and it helped Windoz sale ("See... It runs on Windows but does not run on Apple or Linux"). But their finally gave up. Obviously, if they want to have Windows in the enterprise, they have to provide some interoperability. So there are three type of links in Windoz: soft links (for files and directories), hard links for files and hard links for directories -- that they call junctions. They are still different from Unix links (especially in the context of what can you link with what, and what is a local partitioin and what is not), but they are close. The links are created with the DOS mklink command within the elevated command prompt (yes, "Who controls the language, controls the people", read some Orwell http://en.wikipedia.org/wiki/Politics_and_the_English_Language).
Before installing anything I created directories from Cygwin in my USERPROFILE Windoz directory. Just typed the following in the Cygwin's terminal in my Cygwin's $HOME directory:
$ mkdir /cygdrive/c/Users/jkl/.vagrant.d
$ mkdir /cygdrive/c/Users/jkl/.VirtualBox
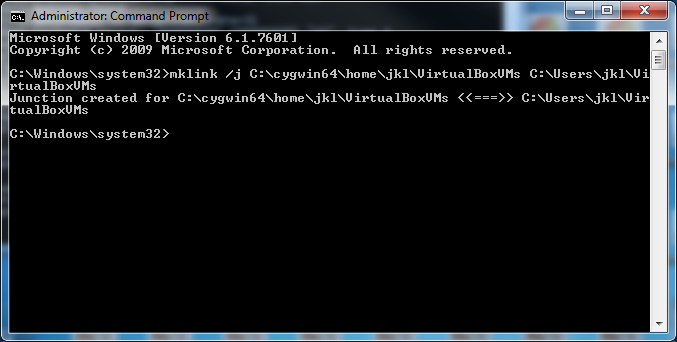
Then got the elevated command prompt (which can be translated from the MS New-speak to: Windows terminal with administrator privileges) (this is what you do: [Start] -> [All Programs] ->[ Accessories] -> [Command Prompt], right-click on [Run as administrator]). Then created junctions, i.e., directory hard links. In the Elevated Windows Command Prompt that appeared, I typed:
 mklink /j C:\cygwin64\home\jkl\.vagrant.d C:\Users\jkl\.vagrant.d
 mklink /j C:\cygwin64\home\jkl\.VirtualBox C:\Users\jkl\.VirtualBox
To make sure that the links were created, I checked within my Cygwin xterm in my $HOME and typed:
$ ls -la .VirtualBox .vagrant.d
lrwxrwxrwx 1 Administrators None 32 Jan  4 17:17 .vagrant.d ->
                                    /cygdrive/c/Users/jkl/.vagrant.d
lrwxrwxrwx 1 Administrators None 33 Jan  4 17:21 .VirtualBox ->
                                    /cygdrive/c/Users/jkl/.VirtualBox
At this point you may ask yourself Does this guy know that you can create links under Cygwin? The guy knows, but he wants the native Windoz junctions since the VirtualBox runs on Windoz, not on Cygwin. Why? Because Cygwin may change its linking methods on the next update, while the Windoz will keep them compatible with the current software for backward compatibility reasons.
Before, when I installed my Cygwin, I also created junction for the Program Files Windoz folders, namely, in the Command Prompt window with Admin privileges, I typed:
mklink /j  C:\Program_Files  "C:\Program Files"
mklink /j  C:\Program_Files_x86 "C:\Program Files (x86)"
This simplifies my life a lot under Cygwin (these darned spaces in file and directory names), since I do not have to put the stuff inside double quotes in my scripts and
cd /cygdrive/c/Program_Files/Oracle
will work without quotes.
Next, I added the following Environment Variables to Windows ( [Start] -> [Control Panel] -> [System and Security] -> [System], click on [Advanced system settings], click on [Environment Variables]. I added them for the root (which is my user that has admin privileges on Windows) and also to the System variables in the dialog below below. This is what you should see:
I know that this is redundant, but Windows and Cygwin have strange ways.
VBOX_USER_HOME=C:\Users\jkl\.VirtualBox
VAGRANT_HOME=C:\Users\jkl\.vagrant.d
VAGRANT_NO_COLOR=1
VAGRANT_LOG=info
If you are at it, you may want to edit all the environment variables that have Program Files and Program Files (x86) to Program_Files and Program_Files_x86, respectively (provided that you ran the mklink commands on them as described above).
You will pretty soon have to change the VAGRANT_LOG=info to VAGRANT_LOG=warn, since the amount of logging that appears on your console is unbearable. It is good when you are trying to learn stuff, but for routine use, this is very annoying. Vagrant is run in the so called Project Directory. The name comes from the fact that this is a directory that you will share between the host and the guest VM (Virtual Machine) and it is usually the files that you work on for some project. You will be pushing this diectory to a git repository (like github) and you will be pulling and fetching the new stuff from the git repository (or Subversion or ClearCase). This is a directory where you will run the vagrant init and vagrant up commands soon (and a lot of other commands after you RTFM (Read The Fricken Manual at: http://docs.vagrantup.com/v2/cli/). We will talk about it later. BTW, the Vagrant people now promise that I do not have to add Vagrant bin directory to the Windoz %PATH% since installation process does it. But, make sure you look at this in the Environment Variables, and that you fix the damned Program Files with a space embedded.
I created my Project Directory for the default box that comes with Vagrant installation as:
$ mkdir /cygdrive/c/cygwin64/home/jkl/vagrant_ubuntu
Before installing VirtualBox and Vagrant I rebooted the machine to make sure that Windoz Environment Variables are known to the Windoz processes, among them Cygwin. After reboot I checked that the environment variables show up within Cygwin:
$env | grep VAGRANT VAGRANT_LOG=info VAGRANT_HOME=C:\Users\jkl\.vagrant.d VAGRANT_NO_COLOR=1 $ env | grep VBOX VBOX_USER_HOME=C:\Users\jkl\.VirtualBox
Then I went to https://www.virtualbox.org/wiki/Downloads and downloaded installers:
They will usually download to your Windoz Downloads folder, though I usually save the stuff in a different directory. When you right click on the VirtualBox installer VirtualBox-4.3.20-96997-Win.exe and choose [Install] you are you greeted with the Window:

Then you can choose the installation directory. I left it at default:
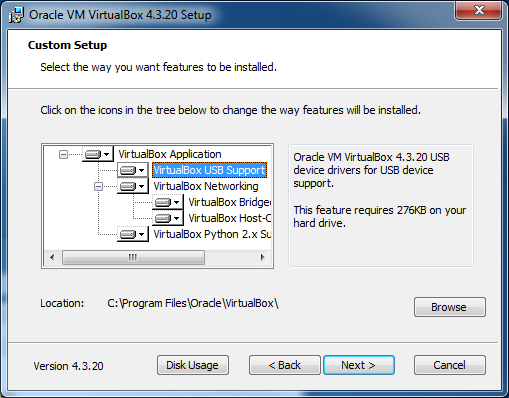
Left the Setup unchanged:

Then I got a warning about Network Connections

And finally, I could click on [Install]:
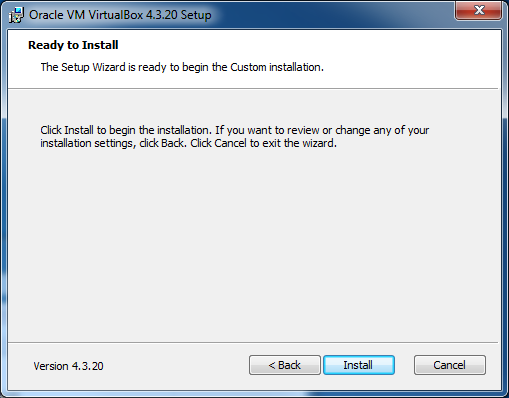
And the installation began:
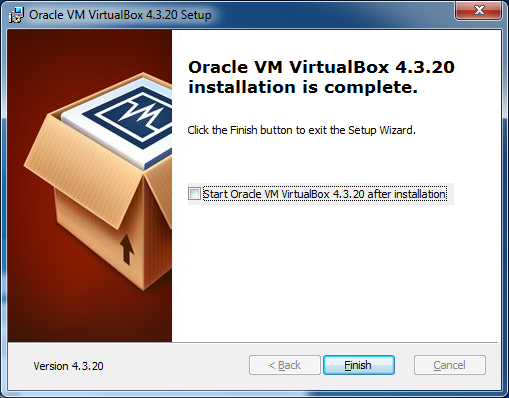
after I entered my Administrator password. The last screen asks me to start VBOX after installation. I said No (this once), since I need to edit something.
Then I started the VirtualBox from the [Start] -> [All Programs] -> [Oracle VM VirtualBox] -> [Oracle VM VirtualBox]. The first screen is not interesting:
![]()
but the deeply hidden magic happens: the VirtualBox creates its default configuration directory on its first run. In my case it was in C:\Users\jkl\.VirtualBox. I can look at the files through the soft link in Cygwin:
$ ls -l .VirtualBox
lrwxrwxrwx 1 Administrators None 33 Jan  4 17:21 .VirtualBox ->
                                         /cygdrive/c/Users/jkl/.VirtualBox
$ ls -l .VirtualBox/
total 20
-rwxr-xr-x 1 jkl None  782 Jan  4 19:16 selectorwindow.log
-rwxr-xr-x 1 jkl None 2608 Jan  4 19:16 vbox-ssl-cacertificate.crt
-rwxr-xr-x 1 jkl None  906 Jan  4 19:16 VBoxSVC.log
-rwxr-xr-x 1 jkl None 1241 Jan  4 19:16 VirtualBox.xml
-rwxr-xr-x 1 jkl None 1156 Jan  4 19:16 VirtualBox.xml-prev
My problem is with the default directory for placing the VM machines. in the default configuration file: VirtualBox.xml is that the directory has a space in its name, namely:
<SystemProperties defaultMachineFolder="C:\Users\jkl\VirtualBox VMs"
defaultHardDiskFormat="VDI" VRDEAuthLibrary="VBoxAuth"
webServiceAuthLibrary="VBoxAuth" LogHistoryCount="3"
exclusiveHwVirt="false"/>
I hate the space in the directory name for defaultMachineFolder
since I would need to use quotes to cd to it. So
I want it to be VirtualBoxVMs. They warn you not to
edit the file by hand (since you can mess up the whole thing
if you do not know XML),
so I used the utility that comes with VirtualBox.
Before I can use it, I need to add the directory with
VirtualBox to the PATH.
I went to the Control Panel... Environment Variables
(you know the drill...), selected Path
under System Variables, then [Edit] and appended the
$ mkdir /cygdrive/c/Users/jkl/VirtualBoxVMs
and the MS Windoz junction for it in my Cygwin's $HOME directory using the Elevated Command Prompt.
mklink /j C:\cygwin64\home\jkl\VirtualBoxVMs C:\Users\jkl\VirtualBoxVMs
And then... Guess what... I rebooted the PC. It is Windoz and it is a wise thing to do.
Now is the time to get rid of the damned space. In my Cygwin xterm I typed:
$ VBoxManage.exe setproperty machinefolder "C:\Users\jkl\VirtualBoxVMs"
and Voila! The VirtualBox.xml now reads as:
<SystemProperties defaultMachineFolder="C:\Users\jkl\VirtualBoxVMs"
defaultHardDiskFormat="VDI" VRDEAuthLibrary="VBoxAuth"
webServiceAuthLibrary="VBoxAuth" LogHistoryCount="3" exclusiveHwVirt="false"/>
Time to install the Vagrant.
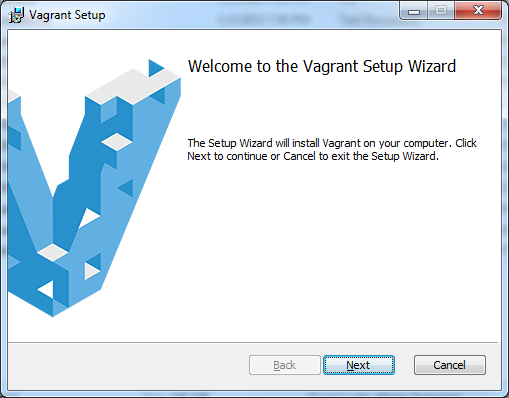
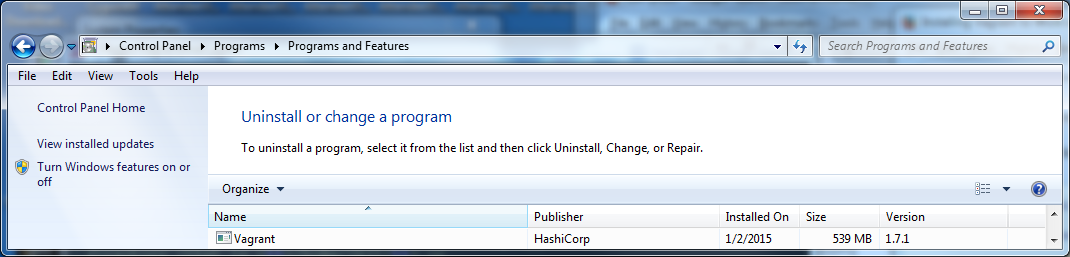
I downloaded Vagrant installer file from the official download page: https://www.vagrantup.com/downloads. At the time of this writing it was 1.7.1. Right clicked on vagrant_1.7.1.msi in Windoz Explorer and clicked on [Install]:
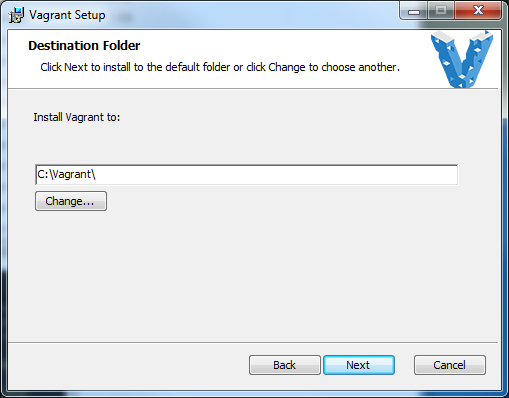
Accepted the MIT license. Then changed the default directory from C:\HashiCorp\Vagrant\ to just C:\Vagrant
Then clicked on [Install] that was warning me that I need to enter the admin password: at some point.

After the progress bar reached its destination, I clicked on [Finish]
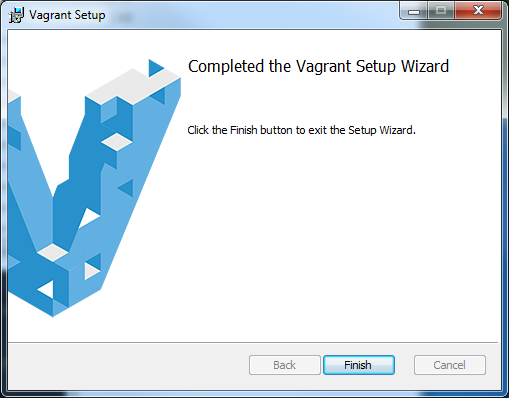
The Vagrant told me that I must restart my computer.
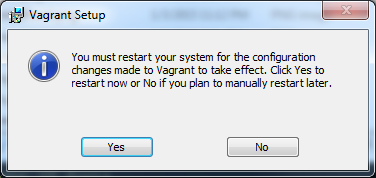
What could I do... I obliged. After Vagrant is installed you can also see it in the Windoz Control Panel:
So, once again, let refresh our memory where we are at this point. In my Cygwin's xterm I typed:
$ pwd
/home/jkl
$ echo $HOME
/home/jkl
$ echo $USERPROFILE
C:\Users\jkl
$ ls -l vagrant_ubuntu
total 0
$ which vagrant
/cygdrive/c/Vagrant/bin/vagrant
$ ls -l .vagrant.d
lrwxrwxrwx 1 Administrators None 32 Jan  4 17:17 .vagrant.d ->
                                           /cygdrive/c/Users/jkl/.vagrant.d
$ ls -l .vagrant.d/
total 0
There is nothing yet in the .vagrant.d since we did not run Vagrant yet. But we created a Project Directory vagrant_ubuntu so let us go there and init Vagrant.
$ cd vagrant_ubuntu
$ pwd
/home/jkl/vagrant_ubuntu
Let us do what the doc says: https://docs.vagrantup.com/v2/getting-started/index.html.
$ vagrant init hashicorp/precise32
 INFO global: Vagrant version: 1.7.1
 INFO global: Ruby version: 2.0.0
 INFO global: RubyGems version: 2.0.14
 INFO global: VAGRANT_DETECTED_OS="CYGWIN_NT-6.1"
 INFO global: VAGRANT_EXECUTABLE="C:\\Vagrant\\embedded\\gems\\gems\\vagrant-1.7.1\\bin\\vagrant"
 INFO global: VAGRANT_HOME="C:\\Users\\jkl\\.vagrant.d"
 INFO global: VAGRANT_INSTALLER_EMBEDDED_DIR="C:\\Vagrant\\embedded"
 INFO global: VAGRANT_INSTALLER_ENV="1"
 INFO global: VAGRANT_INSTALLER_VERSION="2"
 INFO global: VAGRANT_INTERNAL_BUNDLERIZED="1"
 INFO global: VAGRANT_LOG="info"
 INFO global: VAGRANT_NO_COLOR="1"
 INFO global: Plugins:
 INFO global:   - bundler = 1.7.9
 INFO global:   - mime-types = 1.25.1
 INFO global:   - rdoc = 4.0.0
 INFO global:   - rest-client = 1.6.8
 INFO global:   - vagrant-share = 1.1.4
 INFO manager: Registered plugin: box command
 INFO manager: Registered plugin: destroy command
 INFO manager: Registered plugin: global-status command
 INFO manager: Registered plugin: halt command
 INFO manager: Registered plugin: help command
 INFO manager: Registered plugin: init command
 INFO manager: Registered plugin: list-commands command
 INFO manager: Registered plugin: vagrant-login
 INFO manager: Registered plugin: package command
 INFO manager: Registered plugin: plugin command
 INFO manager: Registered plugin: provision command
 INFO manager: Registered plugin: push command
 INFO manager: Registered plugin: rdp command
 INFO manager: Registered plugin: reload command
 INFO manager: Registered plugin: resume command
 INFO manager: Registered plugin: ssh command
 INFO manager: Registered plugin: ssh-config command
 INFO manager: Registered plugin: status command
 INFO manager: Registered plugin: suspend command
 INFO manager: Registered plugin: up command
 INFO manager: Registered plugin: version command
 INFO manager: Registered plugin: ssh communicator
 INFO manager: Registered plugin: winrm communicator
 INFO manager: Registered plugin: Arch guest
 INFO manager: Registered plugin: CoreOS guest
 INFO manager: Registered plugin: Darwin guest
...
 INFO manager: Registered plugin: Slackware host
 INFO manager: Registered plugin: SUSE host
 INFO manager: Registered plugin: Windows host
 INFO manager: Registered plugin: kernel
 INFO manager: Registered plugin: kernel
 INFO manager: Registered plugin: docker-provider
 INFO manager: Registered plugin: Hyper-V provider
 INFO manager: Registered plugin: VirtualBox provider
 INFO manager: Registered plugin: ansible
 INFO manager: Registered plugin: CFEngine Provisioner
 INFO manager: Registered plugin: chef
 INFO manager: Registered plugin: docker
 INFO manager: Registered plugin: file
 INFO manager: Registered plugin: puppet
 INFO manager: Registered plugin: salt
 INFO manager: Registered plugin: shell
 INFO manager: Registered plugin: atlas
 INFO manager: Registered plugin: ftp
 INFO manager: Registered plugin: heroku
 INFO manager: Registered plugin: local-exec
 INFO manager: Registered plugin: noop
 INFO manager: Registered plugin: NFS synced folders
 INFO manager: Registered plugin: RSync synced folders
 INFO manager: Registered plugin: SMB synced folders
 INFO global: Loading plugins!
 INFO manager: Registered plugin: vagrant-share
 INFO manager: Registered plugin: vagrant-share
 INFO vagrant: `vagrant` invoked: ["init", "hashicorp/precise32"]
 INFO environment: Environment initialized (#<Vagrant::Environment:0x395e770>)
 INFO environment:   - cwd: C:/cygwin64/home/jkl/vagrant_ubuntu
 INFO environment: Home path: C:/Users/jkl/.vagrant.d
 INFO environment: Creating: C:/Users/jkl/.vagrant.d/rgloader
 INFO environment: Creating: C:/Users/jkl/.vagrant.d/boxes
 INFO environment: Creating: C:/Users/jkl/.vagrant.d/data
 INFO environment: Creating: C:/Users/jkl/.vagrant.d/tmp
 INFO environment: Creating: C:/Users/jkl/.vagrant.d/data/machine-index
 WARN environment: No local data path is set. Local data cannot be stored.
 INFO environment: Copying private key to home directory
 INFO environment: Running hook: environment_plugins_loaded
 INFO runner: Preparing hooks for middleware sequence...
 INFO runner: 1 hooks defined.
 INFO runner: Running action: #<Vagrant::Action::Builder:0x2674908>
 INFO cli: CLI: [] "init" ["hashicorp/precise32"]
 INFO interface: info: A `Vagrantfile` has been placed in this directory. You are now
ready to `vagrant up` your first virtual environment! Please read
the comments in the Vagrantfile as well as documentation on
`vagrantup.com` for more information on using Vagrant.
A `Vagrantfile` has been placed in this directory. You are now
ready to `vagrant up` your first virtual environment! Please read
the comments in the Vagrantfile as well as documentation on
`vagrantup.com` for more information on using Vagrant.
 INFO environment: Running hook: environment_unload
 INFO loader: Loading configuration in order: [:home, :root]
 INFO host: Autodetecting host type for [#<Vagrant::Environment: C:/cygwin64/home/jkl/vagrant_ubuntu>]
 INFO host: Detected: windows!
 INFO runner: Preparing hooks for middleware sequence...
 INFO runner: 1 hooks defined.
 INFO runner: Running action: #<Vagrant::Action::Builder:0x38f22f0>
Woooa... Remember, we set the logging to info, and we will change it later to warn to limit this output. Now, let see what happened:
$ pwd
/home/jkl/vagrant_ubuntu
$ ls -l
total 4
-rwxr-xr-x+ 1 jkl None 3071 Jan  4 23:23 Vagrantfile
Now, let us click on this link: Vagrantfile and see what is in it. Comments... Beside:
Vagrant.configure(2) do |config|
config.vm.box = "hashicorp/precise32"
The VagrantFile uses simple Ruby syntax.
Some people love Ruby
but I cannot understand why. I personally hate languages that do not use
blocks and you are a hero when you squeeze everything on one line.
Languages like this remind me
of Basic or
Did something changed in the .vagrant.d?
$ ls -l ~/.vagrant.d
lrwxrwxrwx 1 Administrators None 32 Jan  4 17:17 /home/jkl/.vagrant.d ->
                                         /cygdrive/c/Users/jkl/.vagrant.d
$ ls -l ~/.vagrant.d/
total 5
drwxr-xr-x+ 1 jkl None    0 Jan  4 23:23 boxes
drwxr-xr-x+ 1 jkl None    0 Jan  4 23:23 data
drwxr-xr-x+ 1 jkl None    0 Jan  4 23:23 gems
-rwxr-xr-x  1 jkl None 1675 Jan  4 23:23 insecure_private_key
drwxr-xr-x+ 1 jkl None    0 Jan  4 23:23 rgloader
-rwxr-xr-x  1 jkl None    3 Jan  4 23:23 setup_version
drwxr-xr-x+ 1 jkl None    0 Jan  4 23:23 tmp
Our .vagrant.d is no longer empty! But the real thing happens when we try to start the virtual machine for the first time:
$ script
Script started, file is typescript
$ vagrant up
... Lotsa stuff at this link What vagrant up spewed
$ exit
exit
Script done, file is typescript
If you wonder what this script thing is, it is a Unix
utility that sends the screen output to a file in the
current directory, namely typescript. Very useful...
Do a

Note that the command
$ ls -l VirtualBoxVMs
lrwxrwxrwx 1 Administrators None 35 Jan  4 20:02 VirtualBoxVMs ->
                                        /cygdrive/c/Users/jkl/VirtualBoxVMs

$ ls -lR VirtualBoxVMs/
VirtualBoxVMs/:
total 4
drwxr-xr-x+ 1 jkl None 0 Jan  4 23:46 vagrant_ubuntu_default_1420433207909_81445

VirtualBoxVMs/vagrant_ubuntu_default_1420433207909_81445:
total 986008
-rwxr-xr-x  1 jkl None 1009647616 Jan  4 23:47 box-disk1.vmdk
drwxr-xr-x+ 1 jkl None          0 Jan  4 23:46 Logs
-rwxr-xr-x  1 jkl None       9234 Jan  4 23:46 vagrant_ubuntu_default_1420433207909_81445.vbox
-rwxr-xr-x  1 jkl None       9235 Jan  4 23:46 vagrant_ubuntu_default_1420433207909_81445.vbox-prev

VirtualBoxVMs/vagrant_ubuntu_default_1420433207909_81445/Logs:
total 416
-rwxr-xr-x 1 jkl None  54928 Jan  4 23:47 VBox.log
-rwxr-xr-x 1 jkl None 291723 Jan  4 23:46 VBoxStartup.log
Big VM1!!! file, 1GBytes big... This is not the box that was downloaded, however. It is essentially a pseudo hard drive of the VM (Virtual Machine) that is currently running under the control of the VirtualBox. The box, i.e., the file that was retrieved by Vagrant and contains the Ubuntu image to be run, is actually smaller:
$ ls -l ~/.vagrant.d
lrwxrwxrwx 1 Administrators None 32 Jan  4 17:17 /home/jkl/.vagrant.d ->
                                         /cygdrive/c/Users/jkl/.vagrant.d
$ ls -lR ~/.vagrant.d/boxes
/home/jkl/.vagrant.d/boxes:
total 0
drwxr-xr-x+ 1 jkl None 0 Jan  4 23:46 hashicorp-VAGRANTSLASH-precise32

/home/jkl/.vagrant.d/boxes/hashicorp-VAGRANTSLASH-precise32:
total 1
drwxr-xr-x+ 1 jkl None  0 Jan  4 23:46 1.0.0
-rwxr-xr-x  1 jkl None 47 Jan  4 23:46 metadata_url

/home/jkl/.vagrant.d/boxes/hashicorp-VAGRANTSLASH-precise32/1.0.0:
total 4
drwxr-xr-x+ 1 jkl None 0 Jan  4 23:46 virtualbox

/home/jkl/.vagrant.d/boxes/hashicorp-VAGRANTSLASH-precise32/1.0.0/virtualbox:
total 288338
-rwxr-xr-x 1 jkl None     14103 Jan  4 23:46 box.ovf
-rwxr-xr-x 1 jkl None 295237632 Jan  4 23:46 box-disk1.vmdk
-rwxr-xr-x 1 jkl None        25 Jan  4 23:46 metadata.json
-rwxr-xr-x 1 jkl None       505 Jan  4 23:46 Vagrantfile
What you may have missed is that additional directory was created under our Project Directory that is: ~/vagrant_ubuntu:
$ pwd
/home/jkl/vagrant_ubuntu
$ ls -la
total 56
drwxr-xr-x+ 1 jkl None    0 Jan  4 23:53 .
drwxr-xr-x+ 1 jkl None    0 Jan  4 23:46 ..
drwxr-xr-x+ 1 jkl None    0 Jan  4 23:43 .vagrant
-rwxr-xr-x+ 1 jkl None 3071 Jan  4 23:23 Vagrantfile
$ ls -laR .vagrant
.vagrant:
total 4
drwxr-xr-x+ 1 jkl None 0 Jan  4 23:43 .
drwxr-xr-x+ 1 jkl None 0 Jan  4 23:53 ..
drwxr-xr-x+ 1 jkl None 0 Jan  4 23:43 machines

.vagrant/machines:
total 0
drwxr-xr-x+ 1 jkl None 0 Jan  4 23:43 .
drwxr-xr-x+ 1 jkl None 0 Jan  4 23:43 ..
drwxr-xr-x+ 1 jkl None 0 Jan  4 23:43 default

.vagrant/machines/default:
total 4
drwxr-xr-x+ 1 jkl None 0 Jan  4 23:43 .
drwxr-xr-x+ 1 jkl None 0 Jan  4 23:43 ..
drwxr-xr-x+ 1 jkl None 0 Jan  4 23:47 virtualbox

.vagrant/machines/default/virtualbox:
total 13
drwxr-xr-x+ 1 jkl None    0 Jan  4 23:47 .
drwxr-xr-x+ 1 jkl None    0 Jan  4 23:43 ..
-rwxr-xr-x+ 1 jkl None   40 Jan  4 23:47 action_provision
-rwxr-xr-x+ 1 jkl None   10 Jan  4 23:46 action_set_name
-rwxr-xr-x+ 1 jkl None   36 Jan  4 23:46 id
-rwxr-xr-x+ 1 jkl None   32 Jan  4 23:46 index_uuid
-rwxr-xr-x+ 1 jkl None 1706 Jan  4 23:47 private_key
-rwxr-xr-x+ 1 jkl None  118 Jan  4 23:47 synced_folders
Ok, the VM is running, and now what? The first thing to do is to login to it.
$ pwd
/home/jkl/vagrant_ubuntu

$ vagrant ssh
 INFO global: Vagrant version: 1.7.1
 INFO global: Ruby version: 2.0.0
 INFO global: RubyGems version: 2.0.14
 INFO global: VAGRANT_DETECTED_OS="CYGWIN_NT-6.1"
 INFO global: VAGRANT_EXECUTABLE="C:\\Vagrant\\embedded\\gems\\gems\\vagrant-1.7.1\\bin\\vagrant"
 INFO global: VAGRANT_HOME="C:\\Users\\jkl\\.vagrant.d"
 INFO global: VAGRANT_INSTALLER_EMBEDDED_DIR="C:\\Vagrant\\embedded"
  ...
 Lotsa stuff here that was spewed up under this link
Welcome to Ubuntu 12.04 LTS (GNU/Linux 3.2.0-23-generic-pae i686)

 * Documentation:  https://help.ubuntu.com/
New release '14.04.1 LTS' available.
Run 'do-release-upgrade' to upgrade to it.

Welcome to your Vagrant-built virtual machine.
Last login: Fri Sep 14 06:22:31 2012 from 10.0.2.2
vagrant@precise32:~$
So, I am in. But Who am I?:
vagrant@precise32:~$ whoami
vagrant
vagrant@precise32:~$ id
uid=1000(vagrant) gid=1000(vagrant) groups=1000(vagrant),4(adm),24(cdrom),
       27(sudo),30(dip),46(plugdev),109(lpadmin),110(sambashare),999(admin)
vagrant@precise32:~$
So I am a user vagrant and I have access to group sudo. I decided to set up password for root:
vagrant@precise32:~$ sudo passwd root
Enter new UNIX password: *********
Retype new UNIX password: *********
passwd: password updated successfully
vagrant@precise32:~$
If you want to know what password I chose, it was vagrant, the same as for the user vagrant. Unsafe? Yes, but at the same time, the user vagrant can become a root through sudo. So why bother: my memory is good but short. Now I can actually su to root on my VM:
vagrant@precise32:~$ su -
Password: *********
root@precise32:~# id
uid=0(root) gid=0(root) groups=0(root)
root@precise32:~#
It is now time to read the original Vagrant docs https://docs.vagrantup.com/v2/getting-started/#. There are very easy to understand that worries me a bit, since there are no easy things in this world, and devil is in the details. They say that you should have a directory on the guest that corresponds to the directory on the host system where you typed your vagrant up command. Indeed, if you do:
vagrant@precise32:~$ ls -la /vagrant   # I am on the guest!
total 11
drwxrwxrwx  1 vagrant vagrant 4096 Jan  5 04:53 .
drwxr-xr-x 23 root    root    4096 Jan  5 04:47 ..
drwxrwxrwx  1 vagrant vagrant    0 Jan  5 04:43 .vagrant
-rwxrwxrwx  1 vagrant vagrant 3071 Jan  5 04:23 Vagrantfile
vagrant@precise32:~$
that looks familiar.
And this is the same directory that I have on the host,
i.e., ~/vagrant_ubuntu (or
$ ls -la /cygdrive/c/cygwin64/home/jkl/vagrant_ubuntu/ # I am on the host!
total 56
drwxr-xr-x+ 1 jkl None    0 Jan  4 23:53 .
drwxr-xr-x+ 1 jkl None    0 Jan  4 23:46 ..
drwxr-xr-x+ 1 jkl None    0 Jan  4 23:43 .vagrant
-rwxr-xr-x+ 1 jkl None 3071 Jan  4 23:23 Vagrantfile
you will get a similar result, beside the fact that Cygwin's
shows the New York time while the virtual Ubuntu shows ZULU
and I will need to change a TZ there.
The files created/modified on either end are visible instantly to the
host and to the guest. In short, the
/vagrant directory on the running VM corresponds
to the Project Directory on the host, i.e., the
directory where you typed the
You need to go through the tutorial at: https://docs.vagrantup.com/v2/getting-started/index.html and try things. For example, I updated the Ubuntu box using apt-get as:
vagrant@precise32:~$ su -  # I am on the guest
Password: *********
root@precise32:~# apt-get update
Ign http://security.ubuntu.com precise-security InRelease
Get:1 http://security.ubuntu.com precise-security Release.gpg [198 B]
Ign http://us.archive.ubuntu.com precise InRelease
Ign http://us.archive.ubuntu.com precise-updates InRelease
Ign http://us.archive.ubuntu.com precise-backports InRelease
....
Hit http://us.archive.ubuntu.com precise-backports/restricted Translation-en
Get:53 http://us.archive.ubuntu.com precise-backports/universe Translation-en [34.4 kB]
Fetched 3,862 kB in 3s (1,146 kB/s)
Reading package lists... Done
root@precise32:~# apt-get install -y apache2
Reading package lists... Done
Building dependency tree
Reading state information... Done
The following extra packages will be installed:
  apache2-mpm-worker apache2-utils apache2.2-bin apache2.2-common libapr1
  libaprutil1 libaprutil1-dbd-sqlite3 libaprutil1-ldap ssl-cert
Suggested packages:
  www-browser apache2-doc apache2-suexec apache2-suexec-custom
  openssl-blacklist
The following NEW packages will be installed:
  apache2 apache2-mpm-worker apache2-utils apache2.2-bin apache2.2-common
  libapr1 libaprutil1 libaprutil1-dbd-sqlite3 libaprutil1-ldap ssl-cert
0 upgraded, 10 newly installed, 0 to remove and 171 not upgraded.
Need to get 1,845 kB of archives.
...
Setting up apache2 (2.2.22-1ubuntu1.7) ...
Setting up ssl-cert (1.0.28ubuntu0.1) ...
Processing triggers for libc-bin ...
ldconfig deferred processing now taking place
root@precise32:~# ps -ef | grep apache  # Is it running?
root      2190     1  0 03:46 ?        00:00:00 /usr/sbin/apache2 -k start
www-data  2193  2190  0 03:46 ?        00:00:00 /usr/sbin/apache2 -k start
www-data  2194  2190  0 03:46 ?        00:00:00 /usr/sbin/apache2 -k start
www-data  2195  2190  0 03:46 ?        00:00:00 /usr/sbin/apache2 -k start
root      2315  1433  0 03:52 pts/0    00:00:00 grep --color=auto apache
root@precise32:~# wget http://localhost  # Get the default page
--2015-01-03 03:53:14--  http://localhost/
Resolving localhost (localhost)... 127.0.0.1
Connecting to localhost (localhost)|127.0.0.1|:80... connected.
HTTP request sent, awaiting response... 200 OK
Length: 177 [text/html]
Saving to: `index.html'

100%[======================================>] 177         --.-K/s   in 0s

2015-01-03 03:53:14 (67.1 MB/s) - `index.html' saved [177/177]

root@precise32:~# cat index.html  # Show me what you've got
<html><body><h1>It works!</h1>
<p>This is the default web page for this server.</p>
<p>The web server software is running but no content has been added, yet.</p>
</body></html>
root@precise32:~# exit   # exit the root account
logout
vagrant@precise32:~$
So, as you see, the Apache Web server was installed and is running in the VM. However, since the port forwarding was not activated yet, I cannot access this page with the browser on the Windoz host. It is served by apache on VM, but ports from VM are not automatically forwarded to the host OS, or you would have a total mess and lots of conflicts. I would need to set up either the port forwarding (easy and more or less safe) or do the bridging (more complex and can open security holes). The basic difference is that the port forwarding kinda exports TCP ports from the VM to the host OS and the host does also the Network Address Translation (NAT), while bridging would assign the VM an IP Address and it would exists on the network like a separate machine that you can log into from other machines, not necessarily the host machine. Sometimes bridging is exactly what you need, but for the newbies the port forwarding is safer since they are not creating a new IP addresses on the local network and the security guys will not come and shoot you on spot.
You can also check that the VM can eat all your disk space on the host OS:
vagrant@precise32:~$ df -k
Filesystem                 1K-blocks      Used Available Use% Mounted on
/dev/mapper/precise32-root  82711212   2143604  76425324   3% /
udev                          181464         4    181460   1% /dev
tmpfs                          75600       276     75324   1% /run
none                            5120         0      5120   0% /run/lock
none                          189000         0    189000   0% /run/shm
/dev/sda1                     233191     24417    196333  12% /boot
vagrant                    959750140 496592584 463157556  52% /vagrant
The /vagrant partition that mirrors the directory where you typed your vagrant init can be filled with lots of data. It is just a mount, and this disk-space exists on the host, not on the guest inside the box. In fact, the VM can fill up the whole disk on your host OS (the size above corresponds to my C: drive on Windoz). When I type the same command in the Cygwin's xterm:
$ df -k
Filesystem     1K-blocks      Used Available Use% Mounted on
C:             959750140 496592756 463157384  52% /cygdrive/c
The Vagrant deployed guest behaves differently than the default procedure of installing the VM with the Oracle VirtualBox. The Oracle VirtualBox asks you (by default) to create a Virtual Disk and specify the maximum size, and it then creates a big file on your host that serves a pseudo hard drive for your guest. Of course, the VirtualBox allows you to do the same what Vagrant does, but you would have to take care of many detauls.
The good practice is to log out (ie., end the ssh connection) with your VM before you want to shut the VM down, or before you want to shut down your host computer. If you do not do it, you may have problems starting it later. At least, this was my experience a few years ago. Maybe they made it fool proof by now, but I still keep things on the safe side. You can either do ^D (CTRL/D) in your ssh terminal, or you can type exit.
vagrant@precise32:~$ exit # on guest
logout
Connection to 127.0.0.1 closed.
$ pwd  # on host now
/home/jkl/vagrant_ubuntu
While you can shutdown the VM from the VirtualBox
console, I usually do it with
the
$ vagrant halt  # on the host in project directory
==> default: Attempting graceful shutdown of VM...
$
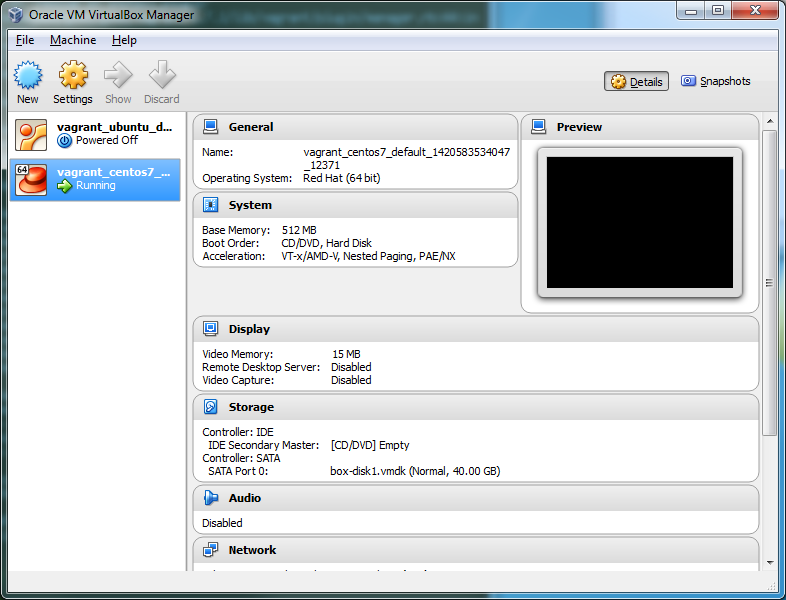
Note the change in your VirtualBox console:
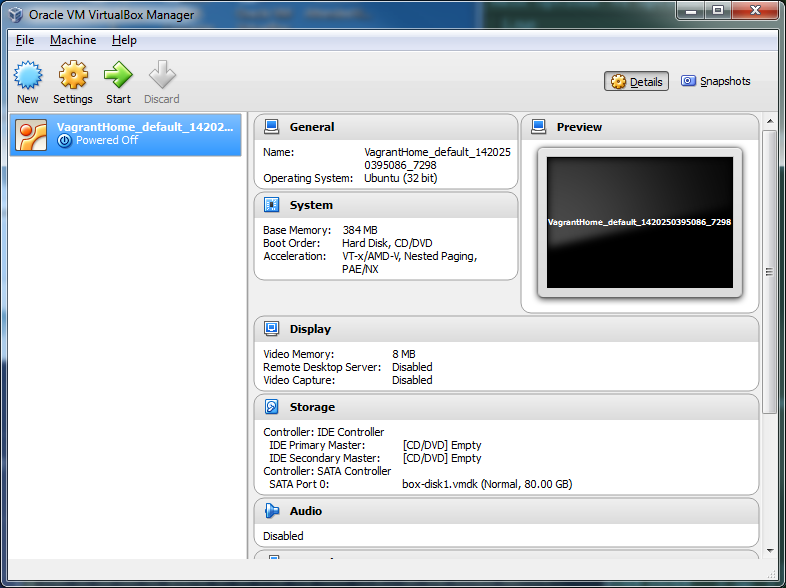
It is now Powered Off and you can safely shut down your PC.
I decided to install another Virtual Machine. I created a directory under Cygwin to have the latest CendOS (CentOS 7) running as guest:
$ mkdir vagrant_centos7
$ cd vagrant_centos7
Looked at https://atlas.hashicorp.com/boxes/search. This is where you can search for boxes. I entered centos 7 in the search field at the top. Then picked up the first one that came out: vStone/centos-7.x-puppet.3.x Centos 7.x - 64bit - Puppet 3.x . But I really should not, and should read more about the thing (what you can do by clicking on the link: vStone/centos-7.x-puppet.3.x where you get more information).
$ pwd
/home/jkl/vagrant_centos7
$ vagrant init vStone/centos-7.x-puppet.3.x
 WARN environment: No local data path is set. Local data cannot be stored.
A `Vagrantfile` has been placed in this directory. You are now
ready to `vagrant up` your first virtual environment! Please read
the comments in the Vagrantfile as well as documentation on
`vagrantup.com` for more information on using Vagrant.

$ vagrant up
Output from vagrant up.
The box did not start by itself and had a lot of errors as you can see in the link above Output from vagrant up.
$ ls -la
total 72
drwxr-xr-x+ 1 jkl None    0 Jan  6 16:09 .
drwxr-xr-x+ 1 jkl None    0 Jan  6 15:43 ..
drwxr-xr-x+ 1 jkl None    0 Jan  6 15:51 .vagrant
-rwxr-xr-x+ 1 jkl None 3080 Jan  6 15:51 Vagrantfile
Started VirtualBox to see what is happening
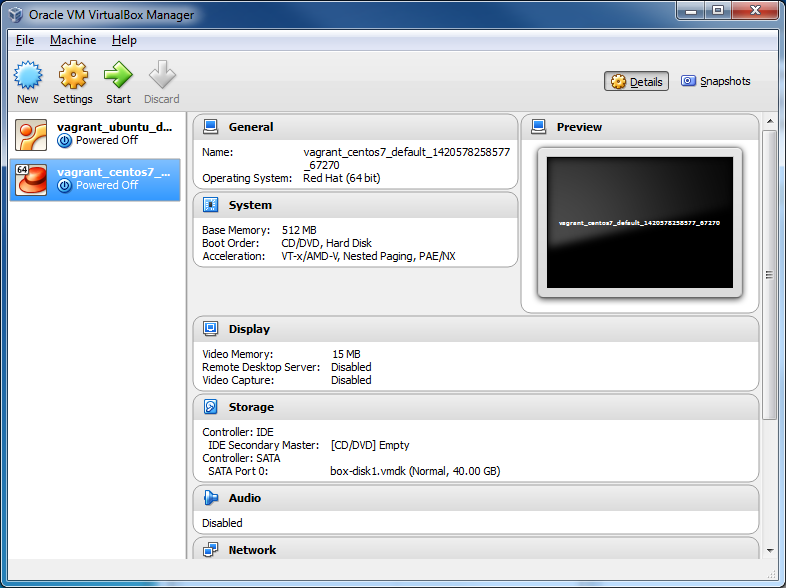
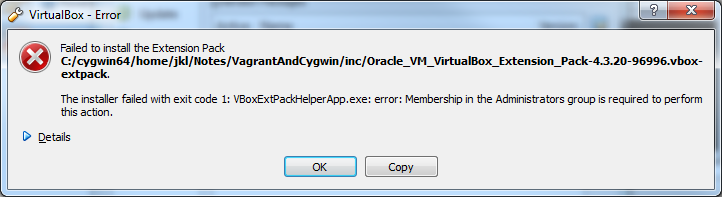
Selected Centos7 Clicked on green ARROW and got error:
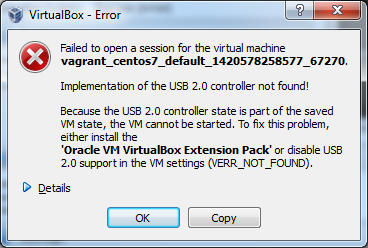
I need the VirtualBox extensions that I actually downloaded with the VirtualBox as shown above, but I did not install them. You need to do the following to install your extensions.
[File] -> [Preferences] -> [Extensions]:
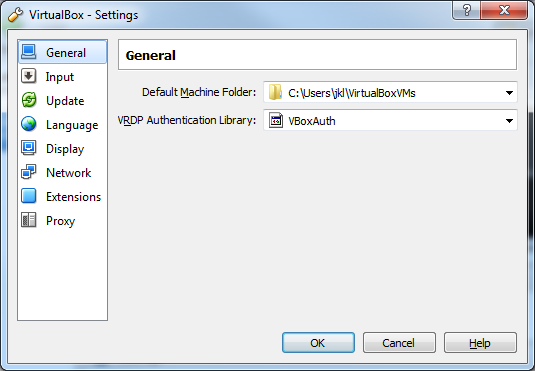
then click on Extensions and click on pull down tab on the right. Now, select the file where you downloaded the Extensions from the VirtualBox Web Site:

Clicked on [Open] and the Warning appeared:
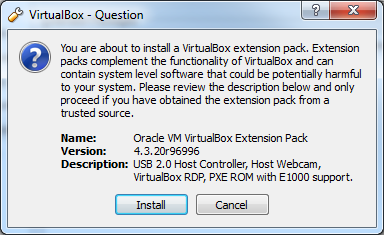
Clicked on [Install]. Then lengthy License appeared that I can use it only for personal use, and so on. This is personal use on my home PC. If you are using the box that requires extensions in the company you need to discuss it with your management, since company use is not personal use. The Oracle will sell you the stuff: http://www.oracle.com/us/technologies/virtualization/virtualbox/overview/index.html
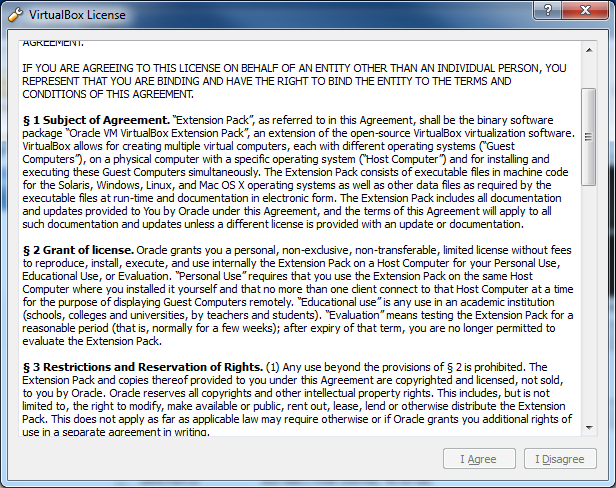
I scrolled down and clicked [I Agree] since it is a personal and educational use. But then another thing happened: The extension Pack can only be installed as Admin.
So I did [File] -> [Exit] in the VirtualBox and reopened it as Admin (i.e., [Start] -> [Oracle VM VirtualBox], and right-clicked, and chose [Run as administrator]. Note that none of my Virtual Machines were running. It probably should not affect the running machines (since it is only a console), but who knows... It installed it now.

Clicked on [OK] and tried to start the Centos 7 guest again by clicking on the [Start] green -> at the top. Now, another surprise... It did not want to start it, since it was aborted before. So I went to my directory and typed:
$ vagrant up
again. No luck. It bitched...
C:/Vagrant/embedded/gems/gems/vagrant-1.7.1/bin/vagrant:174:in `'
There was an error while executing `VBoxManage`, a CLI used by Vagrant
for controlling VirtualBox. The command and stderr is shown below.

Command: ["showvminfo", "6b53bf55-0995-409c-abf3-7851becf7be2"]

Stderr: VBoxManage.exe: error: Failed to create the VirtualBox object!
VBoxManage.exe: error: Code CO_E_SERVER_EXEC_FAILURE (0x80080005) - Server
execution failed (extended info not available)
VBoxManage.exe: error: Most likely, the VirtualBox COM server is not running
 or failed to start.
In desperation and in a disruptive mood I typed:
$ vagrant destroy
It took it a lot of time to destroy and then it failed
There was an error while executing `VBoxManage`, a CLI used by Vagrant
for controlling VirtualBox. The command and stderr is shown below.
Command: ["showvminfo", "6b53bf55-0995-409c-abf3-7851becf7be2"]

Stderr: VBoxManage.exe: error: Failed to create the VirtualBox object!
VBoxManage.exe: error: Code CO_E_SERVER_EXEC_FAILURE (0x80080005) - Server
   execution failed (extended info not available)
VBoxManage.exe: error: Most likely, the VirtualBox COM server is not running
  or failed to start.
Rebooted the Windoz, and started from the empty directory (just did ls -la and then rm each file and repeated the whole procedure like above
$ pwd
/home/jkl/vagrant_centos7
$ vagrant init vStone/centos-7.x-puppet.3.x
$ vagrant up
Now it came up running. But I forgot to change the VAGRANT_LOG to warn, so I did spew too much stuff for my liking. I did:
$ variant halt
$ export VAGRANT_LOG=warn
$ vagrant up
Bringing machine 'default' up with 'virtualbox' provider...
==> default: Checking if box 'vStone/centos-7.x-puppet.3.x' is up to date...
==> default: Clearing any previously set forwarded ports...
==> default: Clearing any previously set network interfaces...
==> default: Preparing network interfaces based on configuration...
    default: Adapter 1: nat
==> default: Forwarding ports...
    default: 22 => 2222 (adapter 1)
==> default: Booting VM...
==> default: Waiting for machine to boot. This may take a few minutes...
    default: SSH address: 127.0.0.1:2222
    default: SSH username: vagrant
    default: SSH auth method: private key
    default: Warning: Connection timeout. Retrying...
==> default: Machine booted and ready!
==> default: Checking for guest additions in VM...
==> default: Mounting shared folders...
    default: /vagrant => C:/cygwin64/home/jkl/vagrant_centos7
==> default: Machine already provisioned. Run `vagrant provision` or use the `--provision`
==> default: to force provisioning. Provisioners marked to run always will
   still run.
The VirtualBox now behaved, or so I though, but it was only the beginning.

$ vagrant ssh
[vagrant@centos-7 ~]$
[vagrant@centos-7 ~]$ yum list httpd
Loaded plugins: fastestmirror
base                                                     | 3.6 kB     00:00
extras                                                   | 3.4 kB     00:00
updates                                                  | 3.4 kB     00:00
extras/7/x86_64/primary_db     FAILED
ftp://ftp.ussg.iu.edu/linux/centos/7.0.1406/extras/x86_64/repodata/
   0528361788d9f92... Timeout on ftp://ftp.ussg.iu.edu/linux/centos/7.0.1406/...
Trying other mirror.
(1/4): base/7/x86_64/group_gz                              | 157 kB   00:05
(2/4): updates/7/x86_64/primary_db                         | 6.0 MB   00:09
(3/4): base/7/x86_64/primary_db                            | 4.9 MB   00:10
(4/4): extras/7/x86_64/primary_db                          |  42 kB   00:05
Determining fastest mirrors
 * base: bay.uchicago.edu
 * extras: mirrors.advancedhosters.com
 * updates: mirror.steadfast.net
Available Packages
httpd.x86_64                    2.4.6-18.el7.centos                     updates

[vagrant@centos-7 ~]$  sudo yum update
.... Zillions
 rubygem-io-console      x86_64 0.4.2-22.el7_0                    updates  49 k
 rubygem-json            x86_64 1.7.7-22.el7_0                    updates  74 k
 rubygem-psych           x86_64 2.0.0-22.el7_0                    updates  76 k
 rubygem-rdoc            noarch 4.0.0-22.el7_0                    updates 317 k
 rubygems                noarch 2.0.14-22.el7_0                   updates 211 k
 selinux-policy          noarch 3.12.1-153.el7_0.13               updates 341 k
 selinux-policy-targeted noarch 3.12.1-153.el7_0.13               updates 3.8 M
 systemd                 x86_64 208-11.el7_0.5                    updates 2.6 M
 systemd-libs            x86_64 208-11.el7_0.5                    updates 153 k
 systemd-sysv            x86_64 208-11.el7_0.5                    updates  36 k
 tzdata                  noarch 2014j-1.el7_0                     updates 434 k

Transaction Summary
==============================================================================
Install   2 Packages
Upgrade  49 Packages

Total download size: 78 M
Is this ok [y/d/N]: y
...
(47/51): systemd-208-11.el7_0.5.x86_64.rpm                 | 2.6 MB   00:04
(48/51): selinux-policy-targeted-3.12.1-153.el7_0.13.noarc | 3.8 MB   00:06
(49/51): systemd-sysv-208-11.el7_0.5.x86_64.rpm            |  36 kB   00:00
(50/51): tzdata-2014j-1.el7_0.noarch.rpm                   | 434 kB   00:02
(51/51): systemd-libs-208-11.el7_0.5.x86_64.rpm            | 153 kB   00:05
------------------------------------------------------------------------------
Total                                              1.1 MB/s |  78 MB  01:11
Running transaction check
Running transaction test
Transaction test succeeded
Running transaction
  Updating   : 32:bind-license-9.9.4-14.el7_0.1.noarch                    1/100
  Updating   : selinux-policy-3.12.1-153.el7_0.13.noarch                  2/100
  Updating   : kernel-headers-3.10.0-123.13.2.el7.x86_64                  3/100 ...
  rubygems.noarch 0:2.0.14-22.el7_0
  selinux-policy.noarch 0:3.12.1-153.el7_0.13
  selinux-policy-targeted.noarch 0:3.12.1-153.el7_0.13
  systemd.x86_64 0:208-11.el7_0.5
  systemd-libs.x86_64 0:208-11.el7_0.5
  systemd-sysv.x86_64 0:208-11.el7_0.5
  tzdata.noarch 0:2014j-1.el7_0

Complete!
[vagrant@centos-7 ~]$
Since the new kernel was installed, I need to reboot the virtual machine.
[vagrant@centos-7 ~]$ exit
logout
Connection to 127.0.0.1 closed.
$ vagrant halt
==> default: Attempting graceful shutdown of VM...

$ vagrant up
C:/Vagrant/embedded/gems/gems/vagrant-1.7.1/lib/vagrant/batch_action.rb:82:in
   'block (2 levels) in run'
Failed to mount folders in Linux guest. This is usually because
the "vboxsf" file system is not available. Please verify that
the guest additions are properly installed in the guest and
can work properly. The command attempted was:

mount -t vboxsf -o uid=`id -u vagrant`,gid=`getent group vagrant |
         cut -d: -f3` vagrant /vagrant
mount -t vboxsf -o uid=`id -u vagrant`,gid=`id -g vagrant` vagrant /vagrant

The error output from the last command was:

/sbin/mount.vboxsf: mounting failed with the error: No such device
While the VM runs, it does not share the /vagrant directory. So, updating the Linux with yum messes things up. The VM runs:
The problem is that the VirtualBox Extensions were working with a previous, original kernel, but now we have a new kernel after update:
[root@centos-7 ~]# uname -a
Linux centos-7.x-amd64.vagrantup.com 3.10.0-123.13.2.el7.x86_64 #1
   SMP Thu Dec 18 14:09:13 UTC 2014 x86_64 x86_64 x86_64 GNU/Linux
[root@centos-7 ~]# cat /etc/centos-release
CentOS Linux release 7.0.1406 (Core)
[root@centos-7 ~]#
The extensions need to be re-setup for the new kernel. If I forgot to mention it, be sure that I had run the init.d script below, when I saw the problems with mounting /vagrant. You can do it as many times as you need. I will give another example with another box later in this brain dump.
[vagrant@centos-7 ~]$ ls -l /vagrant
total 0
[vagrant@centos-7 ~]$ su -
Password: ********
Last login: Sun Jan 11 03:32:44 UTC 2015 on pts/0
[root@centos-7 ~]# /etc/init.d/vboxadd setup
Removing existing VirtualBox non-DKMS kernel modules       [  OK  ]
Building the VirtualBox Guest Additions kernel modules
Building the main Guest Additions module                   [  OK  ]
Building the shared folder support module                  [  OK  ]
Building the OpenGL support module                         [  OK  ]
Doing non-kernel setup of the Guest Additions              [  OK  ]
Starting the VirtualBox Guest Additions                    [  OK  ]
[root@centos-7 ~]# exit # back to regular user
logout
[vagrant@centos-7 ~]$ exit # back to my cygwin window
logout
Connection to 127.0.0.1 closed.
$ vagrant reload
==> default: Attempting graceful shutdown of VM...
==> default: Checking if box 'vStone/centos-7.x-puppet.3.x' is up to date...
==> default: Clearing any previously set forwarded ports...
==> default: Fixed port collision for 22 => 2222. Now on port 2200.
==> default: Clearing any previously set network interfaces...
==> default: Preparing network interfaces based on configuration...
    default: Adapter 1: nat
==> default: Forwarding ports...
    default: 22 => 2200 (adapter 1)
==> default: Booting VM...
==> default: Waiting for machine to boot. This may take a few minutes...
    default: SSH address: 127.0.0.1:2200
    default: SSH username: vagrant
    default: SSH auth method: private key
    default: Warning: Connection timeout. Retrying...
    default: Warning: Remote connection disconnect. Retrying...
==> default: Machine booted and ready!
==> default: Checking for guest additions in VM...
==> default: Mounting shared folders...
    default: /vagrant => C:/cygwin64/home/jkl/vagrant_centos7
==> default: Machine already provisioned. Run `vagrant provision` or use the `--provision`
==> default: to force provisioning. Provisioners marked to run always will still run.
$ vagrant ssh
Last login: Sun Jan 11 03:39:51 2015 from 10.0.2.2
[vagrant@centos-7 ~]$  ls -l /vagrant
total 4
-rwxrwxrwx. 1 vagrant vagrant 3080 Jan 11 02:18 Vagrantfile
Seems like we are back in business. While there is a lengthy discussion about the error: https://github.com/mitchellh/vagrant/issues/3341 you may always try first to rebuild the extensions after updating the kernel. Time to install the Apache:
[vagrant@centos-7 ~]$ sudo yum install httpd httpd-devel
Loaded plugins: fastestmirror
Loading mirror speeds from cached hostfile
 * base: centos.hostingxtreme.com
 * extras: mirrors.lga7.us.voxel.net
 * updates: mirrors.lga7.us.voxel.net
Resolving Dependencies
--> Running transaction check
---> Package httpd.x86_64 0:2.4.6-18.el7.centos will be installed
....
==============================================================================
 Package               Arch        Version                   Repository    Size
==============================================================================
Installing:
 httpd                 x86_64      2.4.6-18.el7.centos       updates      2.7 M
 httpd-devel           x86_64      2.4.6-18.el7.centos       updates      181 k
Installing for dependencies:
 apr                   x86_64      1.4.8-3.el7               base         103 k
 apr-devel             x86_64      1.4.8-3.el7               base         188 k
 apr-util              x86_64      1.5.2-6.el7               base          92 k
 apr-util-devel        x86_64      1.5.2-6.el7               base          76 k
 cyrus-sasl            x86_64      2.1.26-17.el7             base          87 k
 cyrus-sasl-devel      x86_64      2.1.26-17.el7             base         309 k
 expat-devel           x86_64      2.1.0-8.el7               base          56 k
 httpd-tools           x86_64      2.4.6-18.el7.centos       updates       77 k
 libdb-devel           x86_64      5.3.21-17.el7_0.1         updates       38 k
 mailcap               noarch      2.1.41-2.el7              base          31 k
 openldap-devel        x86_64      2.4.39-3.el7              base         796 k

Transaction Summary
==============================================================================
Install  2 Packages (+11 Dependent packages)

Total download size: 4.7 M
Installed size: 17 M
Is this ok [y/d/N]: y
...
Dependency Installed:
  apr.x86_64 0:1.4.8-3.el7
  apr-devel.x86_64 0:1.4.8-3.el7
  apr-util.x86_64 0:1.5.2-6.el7
  apr-util-devel.x86_64 0:1.5.2-6.el7
  cyrus-sasl.x86_64 0:2.1.26-17.el7
  cyrus-sasl-devel.x86_64 0:2.1.26-17.el7
  expat-devel.x86_64 0:2.1.0-8.el7
  httpd-tools.x86_64 0:2.4.6-18.el7.centos
  libdb-devel.x86_64 0:5.3.21-17.el7_0.1
  mailcap.noarch 0:2.1.41-2.el7
  openldap-devel.x86_64 0:2.4.39-3.el7

Complete!
[vagrant@centos-7 ~]$ sudo yum install emacs xemacs  # I even sleep with emacs
... Lotsa stuffa
  psmisc.x86_64 0:22.20-8.el7
  urw-fonts.noarch 0:2.4-16.el7
  xorg-x11-font-utils.x86_64 1:7.5-18.1.el7

Complete!
[vagrant@centos-7 ~]$
How about being able to display the xterm from VM on Windoz host?
[vagrant@centos-7 ~]$ sudo yum install xterm xclock
...
Installed:
  xorg-x11-apps.x86_64 0:7.7-6.el7           xterm.x86_64 0:295-3.el7

Dependency Installed:
  libxkbfile.x86_64 0:1.0.8-5.el7
Complete!
[vagrant@centos-7 ~]$ sudo systemctl start httpd.service  # start Apache
[vagrant@centos-7 ~]$ ps -ef | grep httpd  # Is it running?
root      3795     1  0 00:03 ?        00:00:00 /usr/sbin/httpd -DFOREGROUND
apache    3796  3795  0 00:03 ?        00:00:00 /usr/sbin/httpd -DFOREGROUND
apache    3797  3795  0 00:03 ?        00:00:00 /usr/sbin/httpd -DFOREGROUND
apache    3798  3795  0 00:03 ?        00:00:00 /usr/sbin/httpd -DFOREGROUND
apache    3799  3795  0 00:03 ?        00:00:00 /usr/sbin/httpd -DFOREGROUND
apache    3800  3795  0 00:03 ?        00:00:00 /usr/sbin/httpd -DFOREGROUND
vagrant   3802  3764  0 00:03 pts/0    00:00:00 grep --color=auto httpd
[vagrant@centos-7 ~]$ sudo yum install wget  # this thing gets pages
...
Installed:
  wget.x86_64 0:1.14-10.el7_0.1

Complete!
[vagrant@centos-7 ~]$ wget http://127.0.0.1/ # get me the default page
--2015-01-11 04:27:48--  http://127.0.0.1/
Connecting to 127.0.0.1:80... connected.
HTTP request sent, awaiting response... 403 Forbidden
2015-01-11 04:27:49 ERROR 403: Forbidden.
[vagrant@centos-7 ~]$ su -
Password: ********
Last login: Sun Jan 11 03:40:04 UTC 2015 on pts/0
[root@centos-7 ~]# emacs /etc/selinux/config
# changed: SELINUX=enforcing --> SELINUX=permissive

[root@centos-7 ~]# exit  # exit from root shell
logout
[vagrant@centos-7 ~]$ exit   # exit from vagrant user
logout
Connection to 127.0.0.1 closed.  # back in Cygwin xterm
$ vagrant reload
...
$ vagrant ssh
Last login: Sun Jan 11 03:59:23 2015 from 10.0.2.2
[vagrant@centos-7 ~]$ ps -ef | grep httpd # Running?
vagrant   2504  2479  0 04:34 pts/0    00:00:00 grep --color=auto httpd # No!
[vagrant@centos-7 ~]$ sudo systemctl start httpd.service # Start the thing
[vagrant@centos-7 ~]$  wget http://127.0.0.1/ # Still no go...
--2015-01-11 04:35:24--  http://127.0.0.1/
Connecting to 127.0.0.1:80... connected.
HTTP request sent, awaiting response... 403 Forbidden
2015-01-11 04:35:24 ERROR 403: Forbidden.
Seems like selinux was not a problem, and I should have seen it right away, since Apache responded -- I could access the page, and selinux did not block me. The reason was different. Usually there was some page under DocumentRoot in older distributions, but this time there was nothing under /var/www/html/. So I created a test page:
[vagrant@centos-7 html]$ sudo emacs /var/www/html/index.html
<html>
<head>
<title>The Test Page</title>
</head>
<html>
<body>
<h3>Do not panic!  This is only a test<h3>
</body>
</html>
So, now, the wget can get something:
[vagrant@centos-7 ~]$ wget http://127.0.0.1/index.html
--2015-01-11 04:41:33--  http://127.0.0.1/index.html
Connecting to 127.0.0.1:80... connected.
HTTP request sent, awaiting response... 200 OK
Length: 124 [text/html]
Saving to: 'index.html'

100%[======================================>] 124         --.-K/s   in 0s

2015-01-11 04:41:34 (9.40 MB/s) - 'index.html' saved [124/124]

[vagrant@centos-7 ~]$ cat index.html
<html>
<head>
<title>The Test Page</title>
</head>
<html>
<body>
<h3>Do not panic!  This is only a test<h3>
</body>
</html>
[vagrant@centos-7 ~]$
Obviously, I would like to see this page in the browser on my Windoz host. We will get to it. Patience... We will also play with X11 to be shown on the host. Before we do it, I need one more piece for X11 when I will be playing with it:
[vagrant@centos-7 ~]$ sudo yum install xauth  # We will need it later for X11
...
Installed:
  xorg-x11-xauth.x86_64 1:1.0.7-6.1.el7
Complete!
We usually start with a base box -- a minimal installation of the
operating system with only basic packages installed. It is usually
a prototype of your future system.
You need
to provision this minimal box by adding additional packages
and by creating directories and changing configuration of the
installed packages.
Initially, you go to the directory (a Project Directory)
that will contain your new Vagrant project.
You will then run a Vagrant's init command, say
It will initialize a new project directory
with a configuration named precise64
and will import a specific box located at the URL provided.
The URL can be an http: in the World Wild Web or
a file: if you downloaded the box already and have it on your
local disk..
The box will be downloaded and stored by Vagrant on your system
where it can find it later. You will be referring to the
box by the name you gave it on the 1st init.
The Vagrant will also create a special Vagrant configuration file in the project directory, called Vagrantfile. It will look for this file when you will be starting your guest Virtual Machine. This file contains the information how to configure your Virtual Machine and how your host should interact with it. The Vagrantfile is written in Ruby language for some reason. It contains the information about the name of your box and where to get it, if it is not yet downloaded.
So let us get yet another box. We go to:
https://atlas.hashicorp.com/boxes/search.
I searched for CentOS, sorted by downloads,
and picked up the
Software Versions

    CentOS 6.5
    VirtualBox Guest Additions 4.3.6
    Chef 11.8.2
    Puppet 3.4.2
Since I am running the virtual machines under VirtualBox I do not want boxes that were created for other environments. For my collection of boxes I created a directory under Cygwin:
$ mkdir vagrant_centos_6.5
$ cd vagrant_centos_6.5
$ pwd
/home/jkl/vagrant_centos_6.5
$ vagrant init nrel/CentOS-6.5-x86_64
$ vagrant up
Last command created a lot of output that I captured [here]. Now, when I fire-up the VirtualBox, I see:

If your box does not want to download without errors, you can
download it to some directory and then use the URL
on the
wget https://atlas.hashicorp.com/nrel/boxes/CentOS-6.5-x86_64/versions/1.2.0/providers/virtualbox.box
Assuming that you placed the file in the
$ mkdir ~/vagrant_centos_6.5_copy_2
$ pwd
/home/jkl/vagrant_centos_6.5_copy_2
$ vagrant up
Output in [here]. I went to https://atlas.hashicorp.com/boxes/search and searched for centos 6.5.
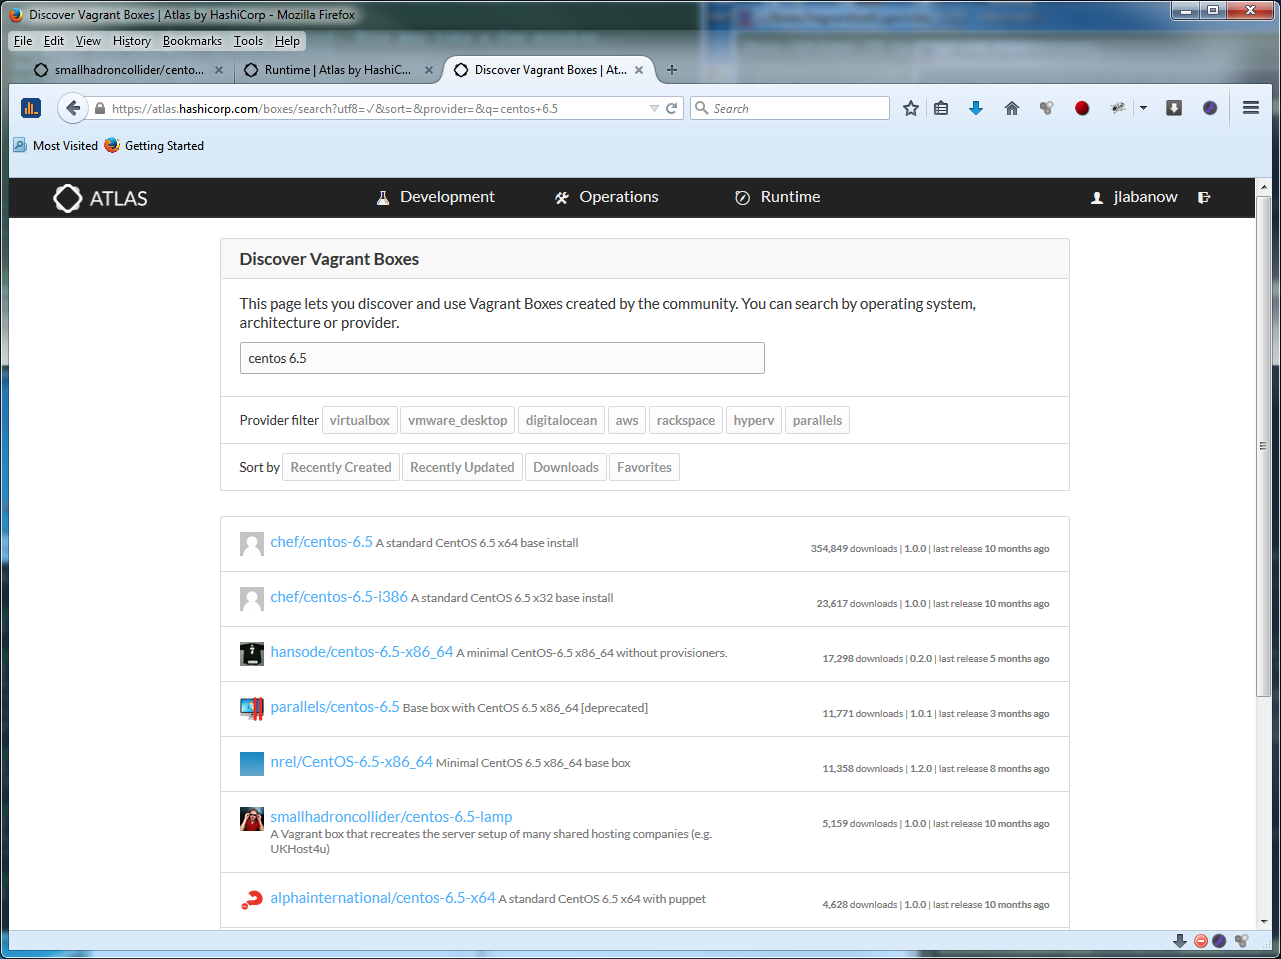
and picked up the box to download and try. Note, since I am using VirtualBox (rather than VMWare or some other environments) I am only for a look-up for boxes to run within VirtualBox) smallhadroncollider/centos-6.5-lamp
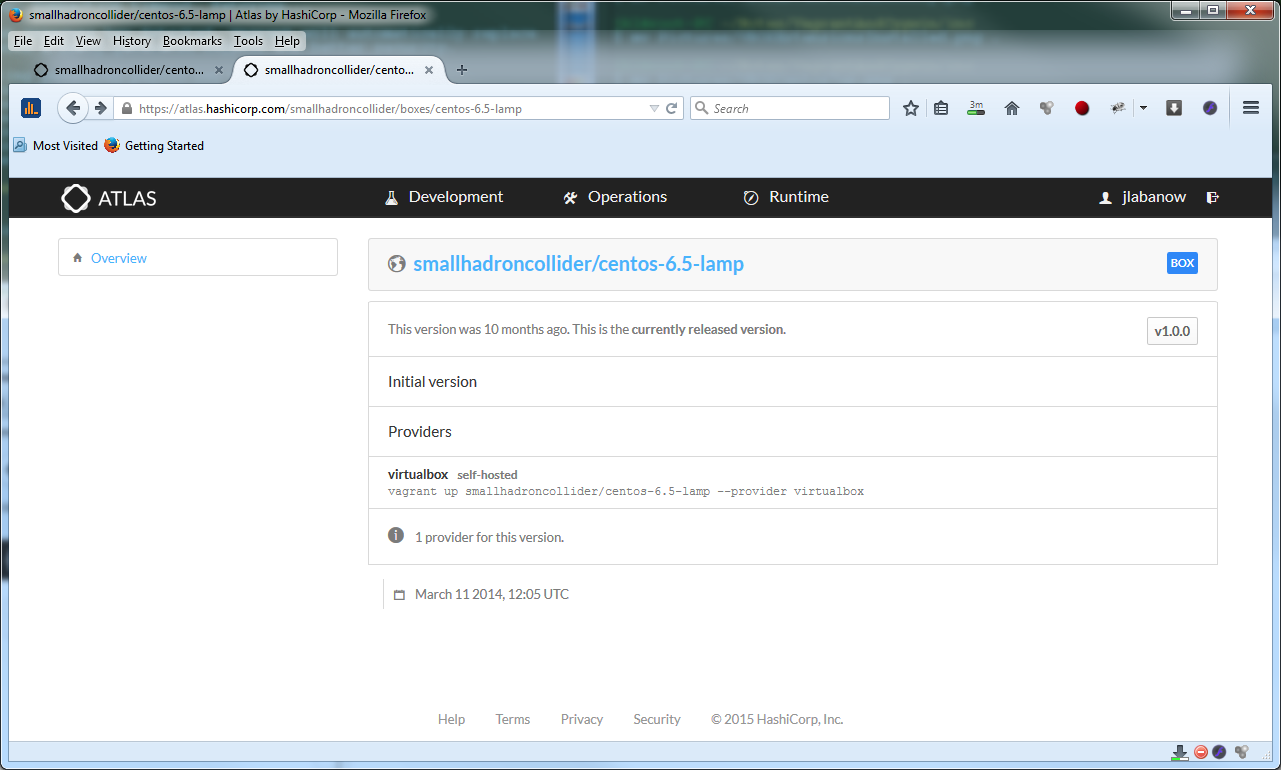
Created a URL for box retrieval (for some reason, they keep it secret and do not give you a direct link to the box):
#                           user                      box-name                 version
https://atlas.hashicorp.com/smallhadroncollider/boxes/centos-6.5-lamp/versions/1.0.0/providers/virtualbox.box
I was redirected to the actual file when I did wget on this URL:
$ wget https://atlas.hashicorp.com/smallhadroncollider/boxes/centos-6.5-lamp/versions/1.0.0/providers/virtualbox.box
HTTP request sent, awaiting response... 302 Found
Location: http://files.smallhadroncollider.com/vagrant/centos-6.5-lamp/centos-6.5-lamp.box [following]
and the download started:
HTTP request sent, awaiting response... 200 OK
Length: 597418061 (570M) [application/octet-stream]
Since wget saves a file under the original name in the original url given I renamed the file to centos-6.5-lamp.box after download was completed
$ mv virtualbox.box centos-6.5-lamp.box
If you used a browser to download this box file, your file will be named as centos-6.5-lamp.box since browser renames the file to the name in the 302 Redirect. I saved the file to my directory with the box file collection named: vagrant_centos_6.5_boxes. Then I used this box saved on my local disk to create a guest under Vagrant.
$ mkdir vagrant_contos_6.5-lamp # Yes, I meant centos, but left it as is
$ cd vagrant_contos_6.5-lamp
$ pwd
/home/jkl/vagrant_contos_6.5-lamp
$ vagrant init vagrant_contos_6.5-lamp \
    file://C:/cygwin64/home/jkl/vagrant_centos_6.5_boxes/centos-6.5-lamp.box
 WARN environment: No local data path is set. Local data cannot be stored.
A `Vagrantfile` has been placed in this directory. You are now
ready to `vagrant up` your first virtual environment! Please read
the comments in the Vagrantfile as well as documentation on
`vagrantup.com` for more information on using Vagrant.
The Vagrantfile for this guest VM can be seen [here]. Then I did the:
$ vagrant up
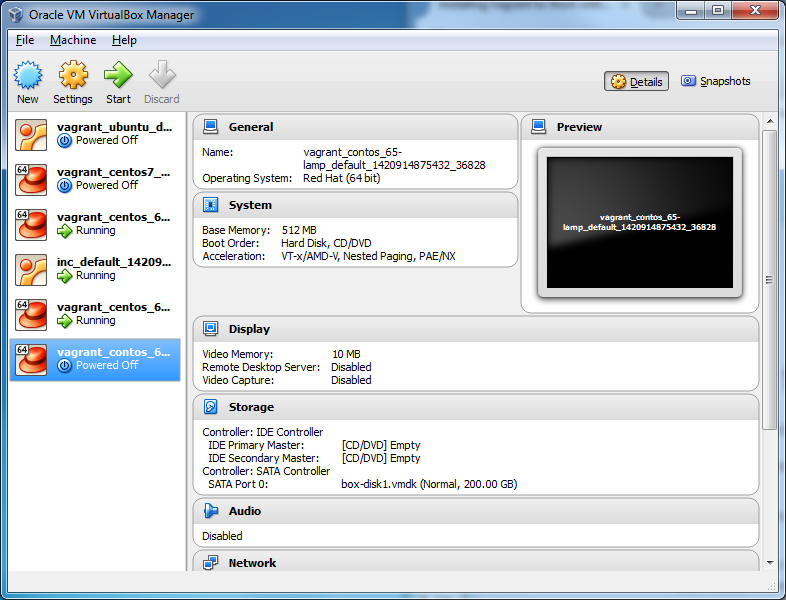
and you can see the output [here]. Now I have 4 boxes running: Note that each box has its own port for SSH and the vagrant remaps the original port in Vagrantfile to the next one that is still not used:
Fixed port collision for 22 => 2222. Now on port 2202.

$ ls -la
total 72
drwxr-xr-x+ 1 jkl None    0 Jan 10 13:40 .
drwxr-xr-x+ 1 jkl None    0 Jan 10 13:28 ..
drwxr-xr-x+ 1 jkl None    0 Jan 10 13:34 .vagrant
-rwxr-xr-x+ 1 jkl None 3065 Jan 10 13:31 Vagrantfile

$ vagrant ssh
Last login: Fri Mar  7 11:05:32 2014 from 10.0.2.2
Welcome to your Vagrant-built virtual machine.
[vagrant@localhost ~]$ sudo yum update  # Let us update the thing
Loaded plugins: fastestmirror
Determining fastest mirrors
epel/metalink                                            |  15 kB     00:00
 * base: bay.uchicago.edu
 * epel: reflector.westga.edu
 * extras: mirror.cogentco.com
 * ius: archive.linux.duke.edu
 * updates: repos.redrockhost.com
base                                                     | 3.7 kB     00:00
base/primary_db                                          | 4.6 MB     00:01
epel                                                     | 4.4 kB     00:00
...
Install       2 Package(s)
Upgrade     155 Package(s)
...
Total download size: 187 M
Is this ok [y/N]: y
...
(157/157): yum-plugin-fastestmirror-1.1.30-30.el6.noarch |  31 kB     00:00
---------------------------------------------------------------------------
Total                                           1.5 MB/s | 187 MB     02:05
...
warning: rpmts_HdrFromFdno: Header V3 RSA/SHA256 Signature, key ID 0608b895: NOKEY
Retrieving key from file:///etc/pki/rpm-gpg/RPM-GPG-KEY-EPEL-6
Importing GPG key 0x0608B895:
 Userid : EPEL (6) <epel@fedoraproject.org>
 Package: epel-release-6-5.noarch (installed)
 From   : /etc/pki/rpm-gpg/RPM-GPG-KEY-EPEL-6
Is this ok [y/N]: y
...
  xfsprogs.x86_64 0:3.1.1-16.el6
  xz-libs.x86_64 0:4.999.9-0.5.beta.20091007git.el6
  yum.noarch 0:3.2.29-60.el6.centos
  yum-plugin-fastestmirror.noarch 0:1.1.30-30.el6

Complete!
[vagrant@localhost ~]$ exit
logout
Connection to 127.0.0.1 closed.
$ vagrant halt   # Back in Cygwin xterm
==> default: Attempting graceful shutdown of VM...
$ vagrant up  # I could have done vagrant reload instead
Bringing machine 'default' up with 'virtualbox' provider...
==> default: Clearing any previously set forwarded ports...
==> default: Fixed port collision for 22 => 2222. Now on port 2202.
==> default: Clearing any previously set network interfaces...
==> default: Preparing network interfaces based on configuration...
    default: Adapter 1: nat
==> default: Forwarding ports...
    default: 22 => 2202 (adapter 1)
==> default: Booting VM...
==> default: Waiting for machine to boot. This may take a few minutes...
    default: SSH address: 127.0.0.1:2202
    default: SSH username: vagrant
    default: SSH auth method: private key
    default: Warning: Connection timeout. Retrying...
    default: Warning: Connection timeout. Retrying...
==> default: Machine booted and ready!
==> default: Checking for guest additions in VM...
==> default: Mounting shared folders...
    default: /vagrant => C:/cygwin64/home/jkl/vagrant_contos_6.5-lamp
...
The error output from the last command was:

/sbin/mount.vboxsf: mounting failed with the error: No such device
>
ERROR vagrant: Failed to mount folders in Linux guest. This is usually because
the "vboxsf" file system is not available. Please verify that
the guest additions are properly installed in the guest and
can work properly. The command attempted was:

mount -t vboxsf -o uid=`id -u vagrant`,gid=`getent group vagrant | cut -d: -f3` vagrant /vagrant
mount -t vboxsf -o uid=`id -u vagrant`,gid=`id -g vagrant` vagrant /vagrant

The error output from the last command was:

/sbin/mount.vboxsf: mounting failed with the error: No such device
.../
Again, we have a problem with the VirtualBox Extensions after upgrading the kernel. Again, there is a problem mounting /vagrant directory to represent Project Directory, i.e., on the /home/jkl/vagrant_contos_6.5-lamp on the host. What I wanted to say is that the /home/jkl/vagrant_contos_6.5-lamp directory cannot be mounted as /vagrant inside the guest virtual machine.
$ vagrant ssh  # we are now inside the guest VM
Last login: Sat Jan 10 18:40:44 2015 from 10.0.2.2
Welcome to your Vagrant-built virtual machine.
[vagrant@localhost ~]$ uname -a
Linux localhost.localdomain 2.6.32-504.3.3.el6.x86_64 #1
     SMP Wed Dec 17 01:55:02 UTC 2014 x86_64 x86_64 x86_64 GNU/Linux
[vagrant@localhost ~]$ cat /etc/centos-release
CentOS release 6.6 (Final)
[vagrant@localhost ~]$
Now my CentOS is updated to 6.6
[vagrant@localhost ~]$ ps -ef | grep http # Apache is running
root      4763     1  0 18:49 ?        00:00:00 /usr/sbin/httpd
vagrant   4772  4763  0 18:49 ?        00:00:00 /usr/sbin/httpd
vagrant   4773  4763  0 18:49 ?        00:00:00 /usr/sbin/httpd
vagrant   4774  4763  0 18:49 ?        00:00:00 /usr/sbin/httpd
vagrant   4775  4763  0 18:49 ?        00:00:00 /usr/sbin/httpd
vagrant   4777  4763  0 18:49 ?        00:00:00 /usr/sbin/httpd
vagrant   4778  4763  0 18:49 ?        00:00:00 /usr/sbin/httpd
vagrant   4779  4763  0 18:49 ?        00:00:00 /usr/sbin/httpd
vagrant   4780  4763  0 18:49 ?        00:00:00 /usr/sbin/httpd
vagrant   5803  5781  0 18:55 pts/0    00:00:00 grep http

[vagrant@localhost ~]$ which emacs   # Do we have emacs here?
/usr/bin/which: no emacs in (/usr/local/bin:/bin:/usr/bin:/usr/local/sbin:
   /usr/sbin:/sbin:/home/vagrant/bin)
[vagrant@localhost ~]$ $ sudo yum install emacs    # I cannot live without my emacs
...
Complete!
[vagrant@localhost ~]$ which emacs   # You better be here
/usr/bin/emacs
[vagrant@localhost ~]$ emacs -nw /etc/httpd/conf/httpd.conf  # How is Apache configured?
Listen 80
...
User vagrant
Group vagrant
...
DocumentRoot "/var/www/public"
...

[vagrant@localhost ~]$ wget http://127.0.0.1  # Let as grab a default page
HTTP request sent, awaiting response... 200 OK
Length: 19 [text/html]
Saving to: "index.html"

100%[======================================>] 19          --.-K/s   in 0s

2015-01-10 19:02:27 (1.43 MB/s) - "index.html" saved [19/19]

[vagrant@localhost ~]$ cat /var/www/public/index.html
<h1>It works!</h1>
I decided to put there my own test file:
[vagrant@localhost ~]$ emacs /var/www/public/index.html
<html>
<head>
<title>The Test Page</title>
</head>
<body>
<h1>It works!</h1>
<p>This is only a test</p>
</body>
</html>
[vagrant@localhost ~]$ wget http://127.0.0.1
--2015-01-10 19:06:14--  http://127.0.0.1/
Connecting to 127.0.0.1:80... connected.
HTTP request sent, awaiting response... 200 OK
Length: 121 [text/html]
Saving to: "index.html.1"

100%[======================================>] 121         --.-K/s   in 0s

2015-01-10 19:06:14 (41.0 MB/s) - "index.html.1" saved [121/121]
[vagrant@localhost ~]$ cat index.html.1  # did I get my page?
<html>
<head>
<title>The Test Page</title>
</head>
<body>
<h1>It works!</h1>
<p>This is only a test</p>
</body>
</html>
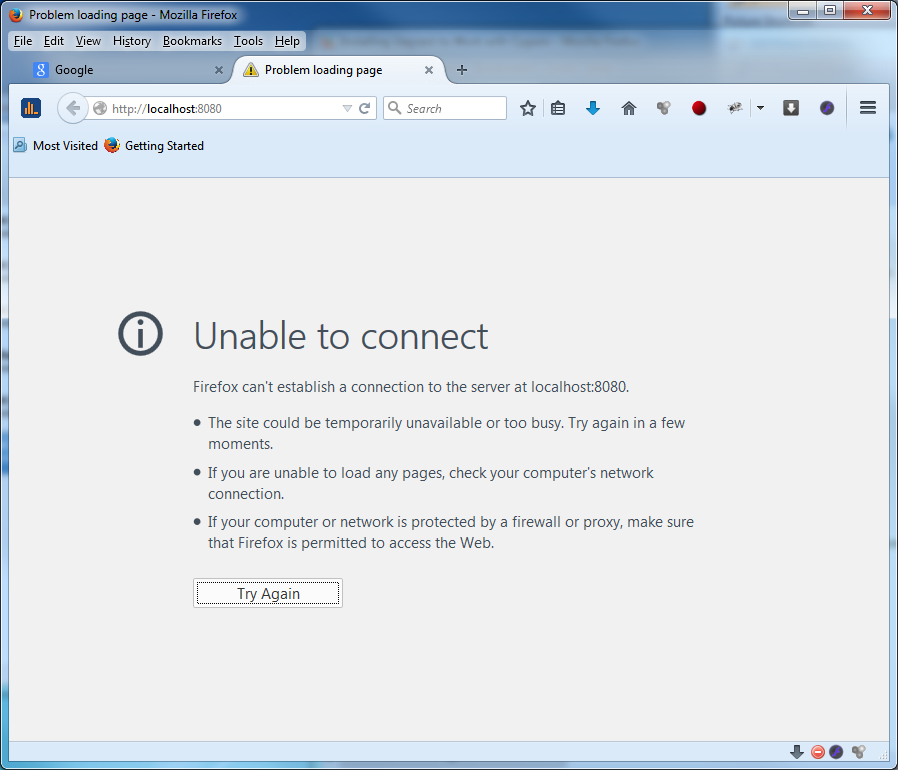
But when I try to access the page on the Windoz host box, I obviously get Unable to connect:
So we need to do the port forwarding. I logged out from the guest VM and then shut it down:
[vagrant@localhost ~]$ exit
logout
Connection to 127.0.0.1 closed.

$ vagrant halt
==> default: Attempting graceful shutdown of VM...
$
$ cd ~/vagrant_contos_6.5-lamp
$ bk Vagrantfile
If you wonder what is the bk command, it is a small script that I find handy. I keep it in my ~/bin or even in /usr/local/bin. It just copies the file given as argument to a file with timestamp appended. Here it is... Use it of loose it...
#!/bin/bash

if (( $# < 1 )); then
  echo "Usage: bk filename(s)"
  exit 1
fi
for i in "$@"; do
  cp -p $i $i.$(date +%y%m%d%H%M%S)
done
I have many variants of it, but basically, I now have a backup copy of the Vagrantfile:
$ ls -l
total 8
-rwxr-xr-x+ 1 jkl None 3065 Jan 10 13:31 Vagrantfile
-rwxr-xr-x+ 1 jkl None 3065 Jan 10 13:31 Vagrantfile.150110141330
Allowing port forwarding in this case is trivial. I changed the existing commented line in the Vagrantfile to forward port 80 from the guest to port 12080 on the host.
 # config.vm.network "forwarded_port", guest: 80, host: 8080
config.vm.network "forwarded_port", guest: 80, host: 12080
While default is 8080 I do not like it too much, since I also have a Tomcat installed on my host and it uses the same port. So let us try it, if it worked:
$ vagrant up
Bringing machine 'default' up with 'virtualbox' provider...
==> default: Clearing any previously set forwarded ports...
==> default: Fixed port collision for 22 => 2222. Now on port 2202.
==> default: Clearing any previously set network interfaces...
==> default: Preparing network interfaces based on configuration...
    default: Adapter 1: nat
==> default: Forwarding ports...
    default: 80 => 12080 (adapter 1)
    default: 22 => 2202 (adapter 1)
==> default: Booting VM...
==> default: Waiting for machine to boot. This may take a few minutes...
    default: SSH address: 127.0.0.1:2202
    default: SSH username: vagrant
    default: SSH auth method: private key
    default: SSH auth method: private key
    default: Warning: Connection timeout. Retrying...
==> default: Machine booted and ready!
==> default: Checking for guest additions in VM...
==> default: Mounting shared folders...
    default: /vagrant => C:/cygwin64/home/jkl/vagrant_contos_6.5-lamp
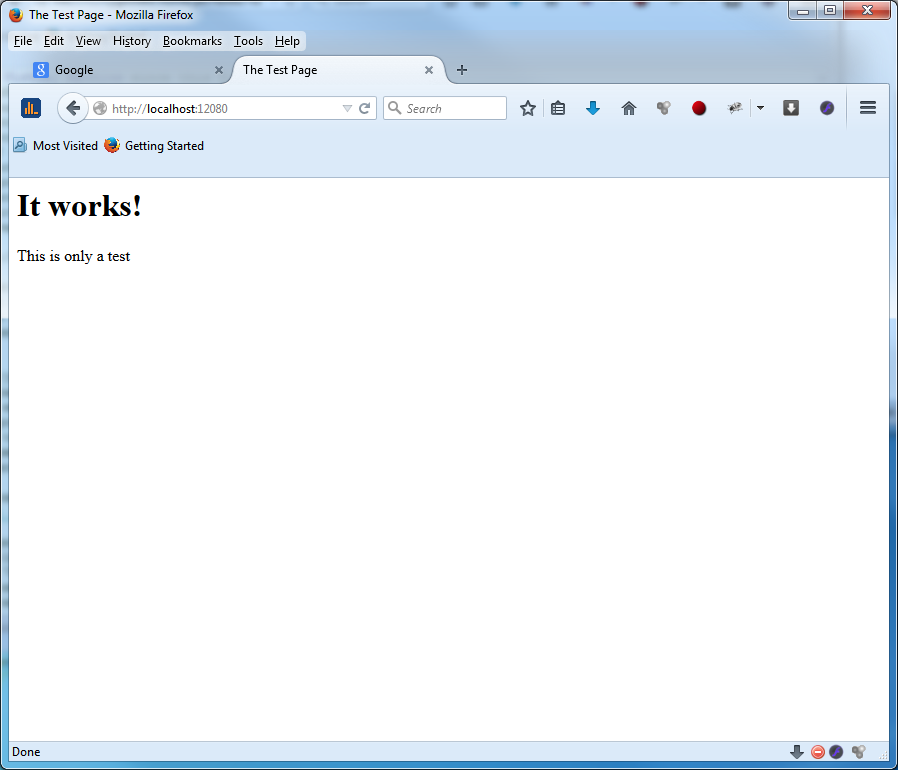
Now if I point my browser on the host to http://localhost:12080/ I get:
This box after kernel update had a problem with mounting Project Directory as /vagrant on the guest. Before you start messing with this, it is prudent to check that you have latest json gem installed, since Vagrant still uses this thing for some things.
$ gem install json -v '1.8.2'
Fetching: json-1.8.2.gem (100%)
Building native extensions.  This could take a while...
Successfully installed json-1.8.2
Parsing documentation for json-1.8.2
Installing ri documentation for json-1.8.2
Done installing documentation for json after 2 seconds
1 gem installed
The mount command on the guest depends on the uid and gid of the user vagrant. Since this is done during provisioning of the box, different people give different ids for this user. I saw a 1000 and in our case it is 501. You can check it with these commands:
id -u vagrant
501
id -g vagrant
501
getent group vagrant
vagrant:x:501:
when you are logged into the guest. So for the case of our vcentos_6.5-lamp box the host Project directory is mounted inside the guest as:
mount -t vboxsf -o uid=501,gid=510 vagrant /vagrant
and you would get an error like:
/sbin/mount.vboxsf: mounting failed with the error: No such device
if VirtualBox extensions are not synced with the kernel. You need to check if the extensions are used. See if you have the /opt/VBoxGuestAdditions-Version directory. For the current box:
[vagrant@localhost ~]$ ls -l /opt
total 8
drwxr-xr-x 4 root root 4096 Jan 10  2014 chef
drwxr-xr-x 9 root root 4096 Jan 10  2014 VBoxGuestAdditions-4.3.6
[vagrant@localhost ~]$
Then check if the vboxadd is in the /etc/init.d. you will need to run the vboxadd as a root.
[root@localhost ~]# mount -t vboxsf -o uid=501,gid=510 vagrant /vagrant
/sbin/mount.vboxsf: mounting failed with the error: No such device
[root@localhost ~]# /etc/init.d/vboxadd setup
Removing existing VirtualBox DKMS kernel modules           [  OK  ]
Removing existing VirtualBox non-DKMS kernel modules       [  OK  ]
Building the VirtualBox Guest Additions kernel modules
Building the main Guest Additions module                   [  OK  ]
Building the shared folder support module                  [  OK  ]
Building the OpenGL support module                         [FAILED]
(Look at /var/log/vboxadd-install.log to find out what went wrong)
Doing non-kernel setup of the Guest Additions              [  OK  ]
If you see errors, make sure that these packages are installed:
[root@localhost ~]# yum install gcc dkms mesa-libGL-devel mesa-libGL
If you still have errors, you may use the advice that I found at http://www.unixmen.com/fix-building-opengl-support-module-failed-error-virtualbox. There are problems when the drm include files cannot be accessed inside the kernel include directory. Workaround in this case would be:
cd /usr/src/kernels/2.6.32-504.3.3.el6.x86_64/include/drm
ln -s /usr/include/drm/drm.h drm.h
ln -s /usr/include/drm/drm_sarea.h drm_sarea.h
ln -s /usr/include/drm/drm_mode.h drm_mode.h
ln -s /usr/include/drm/drm_fourcc.h drm_fourcc.h
Once you did all this (since it just came to you in your dreams), you would run the setup again and be hopeful
[root@localhost drm]# /etc/init.d/vboxadd setup
Removing existing VirtualBox DKMS kernel modules           [  OK  ]
Removing existing VirtualBox non-DKMS kernel modules       [  OK  ]
Building the VirtualBox Guest Additions kernel modules     [  OK  ]
Doing non-kernel setup of the Guest Additions              [  OK  ]
Starting the VirtualBox Guest Additions                    [  OK  ]
[root@localhost drm]# mount -t vboxsf -o uid=501,gid=510 vagrant /vagrant
[root@localhost drm]# df -k
Filesystem           1K-blocks      Used Available Use% Mounted on
/dev/mapper/VolGroup-lv_root
                     203203440   1738424 191136136   1% /
tmpfs                   251080         0    251080   0% /dev/shm
/dev/sda1               487652     47317    414735  11% /boot
vagrant              959750140 518567004 441183136  55% /vagrant
[root@localhost drm]# ls -l /vagrant
total 32
drwxrwxrwx 1 vagrant 510     0 Jan 10 22:01 junk
-rwxrwxrwx 1 vagrant 510 11741 Jan 10 23:09 junk1.out
-rwxrwxrwx 1 vagrant 510 10814 Jan 10 23:08 junk.out
-rwxrwxrwx 1 vagrant 510  3129 Jan 10 19:15 Vagrantfile
-rwxrwxrwx 1 vagrant 510  3065 Jan 10 18:31 Vagrantfile~
-rwxrwxrwx 1 vagrant 510  3065 Jan 10 18:31 Vagrantfile.150110141330
[root@localhost drm]# exit
[vagrant@localhost ~]$ cat > /vagrant/junk2.out
This is junk
^D  # This is CTRL/D that does not show on the screen
[vagrant@localhost ~]$ exit  # We go back to Cygwin
logout
Connection to 127.0.0.1 closed.
$ ls -l   # We are on Cygwin host
total 37
drwxr-xr-x+ 1 jkl None     0 Jan 10 17:01 junk
-rw-r--r--+ 1 jkl None 10814 Jan 10 18:08 junk.out
-rw-r--r--+ 1 jkl None 11741 Jan 10 18:09 junk1.out
-rwxr-xr-x+ 1 jkl None    13 Jan 10 19:14 junk2.out
-rwxr-xr-x+ 1 jkl None  3129 Jan 10 14:15 Vagrantfile
-rwxr-xr-x+ 1 jkl None  3065 Jan 10 13:31 Vagrantfile.150110141330
-rwxr-xr-x+ 1 jkl None  3065 Jan 10 13:31 Vagrantfile~

$ vagrant halt
==> default: Attempting graceful shutdown of VM...
$ vagrant up
Bringing machine 'default' up with 'virtualbox' provider...
==> default: Clearing any previously set forwarded ports...
==> default: Clearing any previously set network interfaces...
==> default: Preparing network interfaces based on configuration...
    default: Adapter 1: nat
==> default: Forwarding ports...
    default: 80 => 12080 (adapter 1)
    default: 22 => 2222 (adapter 1)
==> default: Booting VM...
==> default: Waiting for machine to boot. This may take a few minutes...
    default: SSH address: 127.0.0.1:2222
    default: SSH username: vagrant
    default: SSH auth method: private key
    default: Warning: Connection timeout. Retrying...
==> default: Machine booted and ready!
==> default: Checking for guest additions in VM...
==> default: Mounting shared folders...
    default: /vagrant => C:/cygwin64/home/jkl/vagrant_contos_6.5-lamp
==> default: Machine already provisioned. Run `vagrant provision` or use the `--provision`
==> default: to force provisioning. Provisioners marked to run always will still run.
See that the port forwarding is now done and the folder are mounted. There is one more small thing that is annoying. The guest runs a ZULU time, while my host runs the EST. The way to fix it, is to link the proper time zone to the /etc/localtime on the guest.
$ vagrant ssh
Last login: Sat Jan 10 23:33:47 2015 from 10.0.2.2
Welcome to your Vagrant-built virtual machine.
[vagrant@localhost ~]$ ls -l /vagrant  # file time stamps in ZULU
total 33
drwxrwxrwx 1 vagrant vagrant     0 Jan 10 22:01 junk
-rwxrwxrwx 1 vagrant vagrant 11741 Jan 10 23:09 junk1.out
-rwxrwxrwx 1 vagrant vagrant    13 Jan 11 00:14 junk2.out
-rwxrwxrwx 1 vagrant vagrant    14 Jan 11 00:18 junk3_on_host.out
-rwxrwxrwx 1 vagrant vagrant 10814 Jan 10 23:08 junk.out
-rwxrwxrwx 1 vagrant vagrant  3129 Jan 10 19:15 Vagrantfile
-rwxrwxrwx 1 vagrant vagrant  3065 Jan 10 18:31 Vagrantfile~
-rwxrwxrwx 1 vagrant vagrant  3065 Jan 10 18:31 Vagrantfile.150110141330
[vagrant@localhost ~]$ date  # ZULU time
Sun Jan 11 00:20:53 UTC 2015
[vagrant@localhost ~]$ cat /etc/localtime
TZif2UTCTZif2UTC
UTC0
[vagrant@localhost ~]$ su -
Password: **********  # vagrant of course
[root@localhost ~]# cd /etc
[root@localhost etc]# mv localtime localtime_orig # make a backup!
[root@localhost etc]# ln -s /usr/share/zoneinfo/America/New_York localtimeTZif2UTCTZif2UTC
[root@localhost etc]# date
Sat Jan 10 19:26:37 EST 2015 # finally some sensible time
Now would be a good time to create a few links to a vagrant directory. Say, I want to use this box to develop a Web site. The default directory configured with the out-of-the box Apache where the pages and CGI scripts go, namely:
[vagrant@localhost ~]$ cd /var/www
[vagrant@localhost www]$ ls -l
total 20
drwxr-xr-x 2 root    root    4096 Oct 16 10:49 cgi-bin
drwxr-xr-x 3 root    root    4096 Jan 10 13:45 error
drwxr-xr-x 2 root    root    4096 Oct 16 10:49 html
drwxr-xr-x 3 root    root    4096 Jan 10 13:45 icons
drwxr-xr-x 2 vagrant vagrant 4096 Jan 10 14:05 public
[vagrant@localhost www]$
The public directory was most likely added by the person who provsioned the original box.
I decided to replace the html and cgi-bin folders with links to subdirectories in the /vagrant directory. Before I start messing with this, I better stop the Apache.
[vagrant@localhost www]$ ps -ef | grep httpd
root      1841     1  0 21:15 ?        00:00:00 /usr/sbin/httpd
vagrant   1875  1841  0 21:15 ?        00:00:00 /usr/sbin/httpd
vagrant   1876  1841  0 21:15 ?        00:00:00 /usr/sbin/httpd
vagrant   1877  1841  0 21:15 ?        00:00:00 /usr/sbin/httpd
vagrant   1878  1841  0 21:15 ?        00:00:00 /usr/sbin/httpd
vagrant   1879  1841  0 21:15 ?        00:00:00 /usr/sbin/httpd
vagrant   1880  1841  0 21:15 ?        00:00:00 /usr/sbin/httpd
vagrant   1881  1841  0 21:15 ?        00:00:00 /usr/sbin/httpd
vagrant   1882  1841  0 21:15 ?        00:00:00 /usr/sbin/httpd
vagrant   2404  2385  0 21:17 pts/0    00:00:00 grep httpd
[vagrant@localhost www]$ sudo /etc/rc.d/init.d/httpd stop
Stopping httpd:                                            [  OK  ]
[vagrant@localhost www]$  ps -ef | grep httpd # Still running?
vagrant   2421  2385  0 21:20 pts/0    00:00:00 grep httpd   # No
[vagrant@localhost www]$ [vagrant@localhost www]$  su -
Password: **************
[root@localhost ~]# cd /var/www  # We are a root now
[root@localhost www]# ls -l
total 20
drwxr-xr-x 2 root    root    4096 Oct 16 10:49 cgi-bin
drwxr-xr-x 3 root    root    4096 Jan 10 13:45 error
drwxr-xr-x 2 root    root    4096 Oct 16 10:49 html
drwxr-xr-x 3 root    root    4096 Jan 10 13:45 icons
drwxr-xr-x 2 vagrant vagrant 4096 Jan 10 14:05 public
[root@localhost www]# mv cgi-bin cgi-bin-orig # rename
[root@localhost www]# mv html html-orig# rename
[root@localhost www]# mkdir /vagrant/html # create directory in Project Directory
[root@localhost www]# mkdir /vagrant/cgi-bin  # create directory in Project Directory
[root@localhost www]# ln -s /vagrant/html html # make a symbolic link to /var/www
[root@localhost www]# ln -s /vagrant/cgi-bin cgi-bin # make a symbolic link to /var/www
[root@localhost www]# chown vagrant:vagrant /vagrant/html # change owner to vagrant
[root@localhost www]# chown vagrant:vagrant /vagrant/cgi-bin/
[root@localhost www]# chmod 777 /vagrant/html  # allow all to write
[root@localhost www]# chmod 777 /vagrant/cgi-bin
[root@localhost www]# ls -l html/  # same as ls -l /var/www/html/
total 1
-rwxrwxrwx 1 vagrant vagrant 121 Jan 11 21:46 index.html
I also made some changes to the Apache configuration.
[root@localhost www]# cd /etc/httpd/conf
[root@localhost www]# cp httpd.conf httpd.conf.orig  # a backup is a good thing
[root@localhost www]# emacs httpd.conf
You can compare the original config file httpd.conf.orig with the modified file httpd.conf with a Unix diff command, say:
diff -C 5 httpd.conf.orig httpd.conf > my_diffs
Once I made changes, I restarted the Apache and looked at the http://localhost:12080/ page on my Windoz host in Firefox.
[root@localhost www]# /etc/rc.d/init.d/httpd start
Starting httpd:                                            [  OK  ]
[root@localhost www]#

So things work as expected. I also wanted to check if the stuff in the cgi-bin directory works. The perl was instaled on the systemL
[root@localhost ~]# which perl
/usr/bin/perl
[root@localhost ~]#
When in Cygwin's xterm, in the ~/vagrant_contos_6.5-lamp/cgi-bin, directory, I created a toy CGI page the_time_is_now:
#!/usr/bin/perl

use strict;
use warnings;

my $date = localtime();
print STDOUT "Content-Type: text/plain\r\n\r\nNow is the time: $date\r\n";
and made it executable:
$ chmod 755 the_time_is_now
$ pwd
/home/jkl/vagrant_contos_6.5-lamp/cgi-bin
$ ls -l
total 1
-rwxr-xr-x+ 1 jkl None 142 Jan 11 21:55 the_time_is_now
and checked it in the VM too:
[root@localhost www]# ls -l cgi-bin/
total 1
-rwxrwxrwx 1 vagrant vagrant 142 Jan 11 21:55 the_time_is_now
[root@localhost www]#
Then in the Firefox I used the URL http://localhost:12080/cgi-bin/the_time_is_now to look at it:
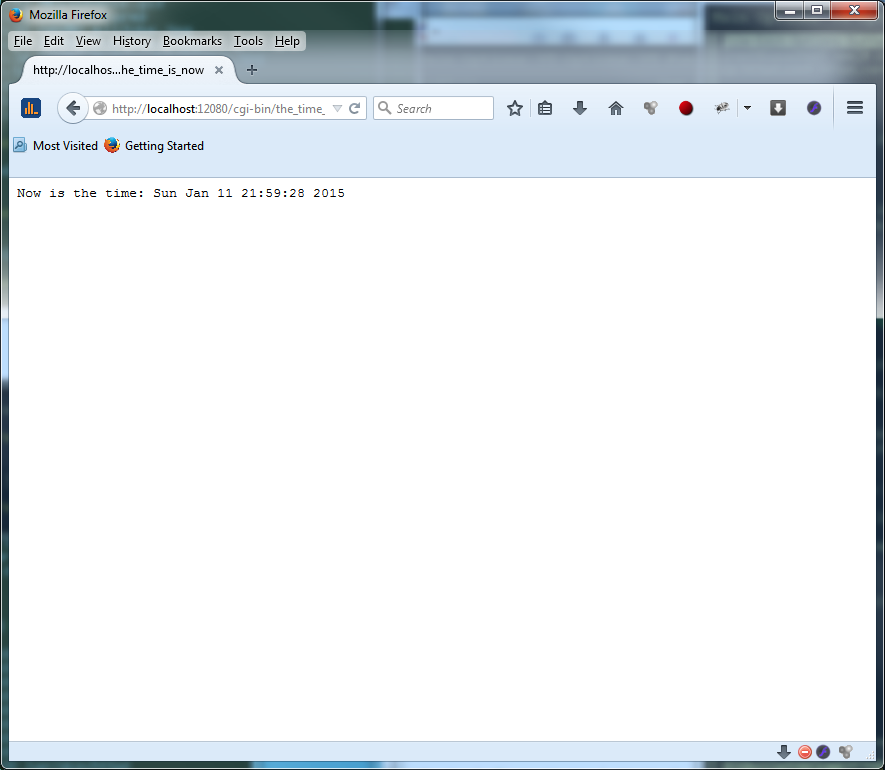
Now, since I put some sweat to make this box updated, it would be good to
save the thing. Note, I am not creating a new box, but I want to
save the current state of the modified box, so when I do
First, I need to check the stuff that I unstalled with yum:
[vagrant@localhost ~]$ sudo yum history list
Loaded plugins: fastestmirror
ID     | Login user       | Date and time    | Action(s)      | Altered
-------------------------------------------------------------------------------
    11 |  <vagrant>       | 2015-01-10 18:44 | Install        |   16
    10 |  <vagrant>       | 2015-01-10 13:57 | Install        |   54
     9 |  <vagrant>       | 2015-01-10 13:44 | I, U           |  157
     8 |  <vagrant>       | 2014-03-07 05:14 | Install        |    1
     7 |  <vagrant>       | 2014-03-07 05:12 | Install        |    3
     6 |  <vagrant>       | 2014-03-07 05:03 | Install        |    5
     5 |  <vagrant>       | 2014-03-07 05:03 | Erase          |    5
     4 |  <vagrant>       | 2014-03-07 05:01 | Install        |   16  <
     3 |  <veewee>        | 2014-01-10 03:35 | Install        |   18 ><
     2 |  <veewee>        | 2014-01-10 03:34 | I, U           |   38 >
     1 | System <unset>   | 2014-01-10 03:30 | Install        |  205
[vagrant@localhost ~]$
Since yum usually caches the downloaded packages, I want to
delete the cached rpms and other stuff, since it will make the
box smaller. This will not affect future
[vagrant@localhost ~]$ sudo yum -v clean all
Loading "fastestmirror" plugin
Config time: 0.007
Yum Version: 3.2.29
Cleaning repos: base epel extras ius updates
Cleaning up Everything
Cleaning up list of fastest mirrors
Now I am theoretically ready to create an updated box
with the Vagrant's

The project directory has the hidden .vagrant directory with the information about the current VM:
$ pwd
/home/jkl/vagrant_contos_6.5-lamp
$ ls -l .vagrant/machines/default/virtualbox
total 9
-rwxr-xr-x+ 1 jkl None   40 Jan 10 13:35 action_provision
-rwxr-xr-x+ 1 jkl None   10 Jan 10 13:34 action_set_name
-rwxr-xr-x+ 1 jkl None   36 Jan 10 13:34 id
-rwxr-xr-x+ 1 jkl None   32 Jan 10 13:34 index_uuid
-rwxr-xr-x+ 1 jkl None 1706 Jan 10 13:35 private_key
-rwxr-xr-x+ 1 jkl None  127 Jan 11 21:15 synced_folders
$ cat .vagrant/machines/default/virtualbox/id
2260ead0-7e51-4893-b17d-19c046e83ef7  # this is a UUID for my box
$ cat .vagrant/machines/default/virtualbox/index_uuid
0a20c6c18b65452695d2363bc060b33d  # this is not a UUID though it has the UUID in the name
$ cat .vagrant/machines/default/virtualbox/synced_folders
{"virtualbox":{"/vagrant":{"guestpath":"/vagrant",
   "hostpath":"C:/cygwin64/home/jkl/vagrant_contos_6.5-lamp","disabled":false}}}
$ VBoxManage list vms
"vagrant_ubuntu_default_1420433207909_81445" {aa11f60a-6063-4caf-b34a-74f3b7ecedf2}
"vagrant_centos7_default_1420583534047_12371" {1bde00e5-596e-44ff-9423-f731defa7089}
"vagrant_centos_65_default_1420907476570_93223" {96a926fb-0105-4842-9e2b-228cb9cbb039}
"inc_default_1420907732191_3364" {4f4cb5f0-2898-4e5b-8ebe-7ba3f7c0c660}
"vagrant_centos_65_copy_2_default_1420908701652_56690" {9c93ce39-1cdb-4e5e-a0ec-e886db60ce04}
"vagrant_contos_65-lamp_default_1420914875432_36828" {2260ead0-7e51-4893-b17d-19c046e83ef7}
"vagrant_centos7_default_1420943014309_20455" {a4fe1d8b-5f6d-461d-a724-d918955019a8}
The UUID Universally Unique Identifier is an important piece if I wanted to create the box outside the Project Directory as it is specific for each virtual machine. In our case it is: 2260ead0-7e51-4893-b17d-19c046e83ef7. I think I double checked everything and now I can stop my VM.
[root@localhost www]# exit  # Bue, bye root
logout
[vagrant@localhost www]$ exit # Bue, bye vagrant
logout
Connection to 127.0.0.1 closed. # Hi Cygwin xterm
$ vagrant halt
==> default: Attempting graceful shutdown of VM...
You can only create a box immediately after you up / halt the machine and in its Project directory, at least it is my experience. So in the project directory of my freshly halted VM I typed a command to see what happens (I need to add more arguments later)
$ vagrant package --output /tmp/mynewbox.box
C:/Vagrant/embedded/gems/gems/vagrant-1.7.1/lib/vagrant/machine.rb:153:in
   'action': wrong number of arguments (2 for 1) (ArgumentError)
        from C:/Vagrant/embedded/gems/gems/vagrant-1.7.1/plugins/commands/package/command.rb:83:in 'package_vm'
        from C:/Vagrant/embedded/gems/gems/vagrant-1.7.1/plugins/commands/package/command.rb:72:in 'block in package_target'
        from C:/Vagrant/embedded/gems/gems/vagrant-1.7.1/lib/vagrant/plugin/v2/command.rb:226:in 'block in with_target_vms'
        from C:/Vagrant/embedded/gems/gems/vagrant-1.7.1/lib/vagrant/plugin/v2/command.rb:220:in 'each'
        from C:/Vagrant/embedded/gems/gems/vagrant-1.7.1/lib/vagrant/plugin/v2/command.rb:220:in 'with_target_vms'
        from C:/Vagrant/embedded/gems/gems/vagrant-1.7.1/plugins/commands/package/command.rb:70:in 'package_target'
        from C:/Vagrant/embedded/gems/gems/vagrant-1.7.1/plugins/commands/package/command.rb:44:in 'execute'
        from C:/Vagrant/embedded/gems/gems/vagrant-1.7.1/lib/vagrant/cli.rb:42:in 'execute'
        from C:/Vagrant/embedded/gems/gems/vagrant-1.7.1/lib/vagrant/environment.rb:301:in 'cli'
        from C:/Vagrant/embedded/gems/gems/vagrant-1.7.1/bin/vagrant:174:in '<main>'
Frankly, I did not expect this... Of course, I looked at the command line and I could not find anything wrong. It was as simple as it can be. But times have changed since my young age. IBM rushed the IBM PC with a faulty architecture to the market in 1981 to kill better offerings from Apple (remember Lisa? It was a pretty good computer for that time) and other companies. Then IBM signed the radiculously legally flawed agreement with MicroSoft to deliver something that will run this thing. And the race to deliver fast, quick, and dirty software began. The good old fashoined companies that refused to take part in this race went belly up (remember DEC?). If you do not push crap to the market as soon as possible, you are dead. So I do not blame the Vagrant people for relasing buggy software. They have to chase the bugs and inventions in Windoz and if they paid attantion to quality, they would be wiped out.
So I googled. The bug is described in https://github.com/mitchellh/vagrant/issues/4931:
@alexwenzel
we recently released Vagrant 1.7.2, which includes that fix (and many more)
in core. You can safely upgrade to Vagrant 1.7.2 and receive that patch
:smile:.
I reinstalled the vagrant (1.7.2) over 1.7.1 exactly as described above. Then I started the virtual machine:
$ vagrant up
Bringing machine 'default' up with 'virtualbox' provider...
==> default: Clearing any previously set forwarded ports...
==> default: Clearing any previously set network interfaces...
==> default: Preparing network interfaces based on configuration...
    default: Adapter 1: nat
==> default: Forwarding ports...
    default: 80 => 12080 (adapter 1)
    default: 22 => 2222 (adapter 1)
==> default: Booting VM...
==> default: Waiting for machine to boot. This may take a few minutes...
    default: SSH address: 127.0.0.1:2222
    default: SSH username: vagrant
    default: SSH auth method: private key
    default: Warning: Connection timeout. Retrying...
==> default: Machine booted and ready!
==> default: Checking for guest additions in VM...
==> default: Mounting shared folders...
    default: /vagrant => C:/cygwin64/home/jkl/vagrant_contos_6.5-lamp
==> default: Machine already provisioned. Run 'vagrant provision' or use the '--provision'
==> default: to force provisioning. Provisioners marked to run always will still run.
Then I did vagrant halt and tried to create a box.
$ vagrant halt
==> default: Attempting graceful shutdown of VM...

$ vagrant package --include cgi-bin/the_time_is_now,html/index.html \
   --vagrantfile VagrantFile  --output vagrant_Centos_6.6_lamp_updated.box
==> default: Clearing any previously set forwarded ports...
==> default: Exporting VM...
==> default: Compressing package to: C:/cygwin64/home/jkl/
                    vagrant_contos_6.5-lamp/vagrant_Centos_6.6_lamp_updated.box
==> default: Packaging additional file: cgi-bin/the_time_is_now
==> default: Packaging additional file: html/index.html
==> default: Packaging additional file: VagrantFile
$ ls -la
total 953556
drwxr-xr-x+ 1 jkl None         0 Jan 12 13:23 .
drwxr-xr-x+ 1 jkl None         0 Jan 12 08:31 ..
drwxr-xr-x+ 1 jkl None         0 Jan 10 13:34 .vagrant
drwxr-xr-x+ 1 jkl None         0 Jan 12 00:59 cgi-bin
drwxr-xr-x+ 1 jkl None         0 Jan 12 00:58 html
-rwxr-xr-x+ 1 jkl None 976352793 Jan 12 13:24 vagrant_Centos_6.6_lamp_updated.box
-rwxr-xr-x+ 1 jkl None      3129 Jan 10 14:15 Vagrantfile
-rwxr-xr-x+ 1 jkl None      3065 Jan 10 13:31 Vagrantfile.150110141330
-rwxr-xr-x+ 1 jkl None      3065 Jan 10 13:31 Vagrantfile~
Note that on the --output option I specified the local file in the Project Directory. Somehow, from my experience, whatever else you specify there will get Ruby confused since Ruby gets very disoriented under Cygwin. It was supposed to run everywhere but it is buggy and has problems with Unix paths (I also tried Windoz paths like C:\\cygwin64\\tmp\\somefile.box) under Cygwin. It is not big deal, since it is easy to move the file elswhere once it is created.
The Vagrant assembles the box under .vagrant.d hidden directory:
$ ls -lR /home/jkl/.vagrant.d/tmp
/home/jkl/.vagrant.d/tmp:
total 0
drwxr-xr-x+ 1 jkl None 0 Jan 12 13:20 1421086833

/home/jkl/.vagrant.d/tmp/1421086833:
total 831120
-rwxr-xr-x 1 jkl None     14429 Jan 12 13:20 box.ovf
-rwxr-xr-x 1 jkl None 848743424 Jan 12 13:20 box-disk1.vmdk
Once all files are there, it will make a gzipped tar archive from these files, rename tgz file to the name of the box can copy it to the destination. We now can see what is inside the box:
$ tar ztf vagrant_Centos_6.6_lamp_updated.box
./box-disk1.vmdk
./box.ovf
./include/
./include/cgi-bin/
./include/html/
./include/_Vagrantfile
./include/html/index.html
./include/cgi-bin/the_time_is_now
./Vagrantfile
./vagrant_private_key
I moved the box to my Box Collection, created a new Project Diectory and tried to init.
$ mv vagrant_Centos_6.6_lamp_updated.box ../vagrant_centos_6.5_boxes
$ cd ..
$ mkdir vagrant_Centos_6.6_lamp_updated
$ cd vagrant_Centos_6.6_lamp_updated
$ vagrant init vagrant_Centos_6.6_lamp \
    file://C:/cygwin64/home/jkl/vagrant_centos_6.5_boxes/vagrant_Centos_6.6_lamp_updated.box
WARN environment: No local data path is set. Local data cannot be stored.
A `Vagrantfile` has been placed in this directory. You are now
ready to `vagrant up` your first virtual environment! Please read
the comments in the Vagrantfile as well as documentation on
`vagrantup.com` for more information on using Vagrant.
$ vagrant up
Bringing machine 'default' up with 'virtualbox' provider...
==> default: Box 'vagrant_Centos_6.6_lamp' could not be found. Attempting to find and install...
    default: Box Provider: virtualbox
    default: Box Version: >= 0
==> default: Adding box 'vagrant_Centos_6.6_lamp' (v0) for provider: virtualbox
    default: Downloading: file://C:/cygwin64/home/jkl/vagrant_centos_6.5_boxes/vagrant_Centos_6.6_lamp_updated.box
    default:
==> default: Successfully added box 'vagrant_Centos_6.6_lamp' (v0) for 'virtualbox'!
==> default: Importing base box 'vagrant_Centos_6.6_lamp'...
==> default: Matching MAC address for NAT networking...
==> default: Setting the name of the VM: vagrant_Centos_66_lamp_updated_default_1421088518124_55373
==> default: Clearing any previously set network interfaces...
==> default: Preparing network interfaces based on configuration...
    default: Adapter 1: nat
==> default: Forwarding ports...
    default: 80 => 12080 (adapter 1)
    default: 22 => 2222 (adapter 1)
==> default: Booting VM...
==> default: Waiting for machine to boot. This may take a few minutes...
    default: SSH address: 127.0.0.1:2222
    default: SSH username: vagrant
    default: SSH auth method: private key
    default: Warning: Connection timeout. Retrying...
==> default: Machine booted and ready!
==> default: Checking for guest additions in VM...
==> default: Mounting shared folders...
    default: /vagrant => C:/cygwin64/home/jkl/vagrant_Centos_6.6_lamp_updated
So far, so good... I noticed that the VirtualBox console shows the thing runnin:

Now... The Web Page shows up? Nope... {:-(}.
$ vagrant ssh
Last login: Mon Jan 12 08:57:15 2015 from 10.0.2.2
Welcome to your Vagrant-built virtual machine.
[vagrant@localhost ~]$ ps -ef | grep httpd
vagrant   2362  2343  0 14:39 pts/0    00:00:00 grep httpd  # Apache not started on boot
[vagrant@localhost ~]$ sudo /etc/rc.d/init.d/httpd start   # Start the Apache guy
Starting httpd: Syntax error on line 292 of /etc/httpd/conf/httpd.conf:
DocumentRoot must be a directory
                                                           [FAILED]
[vagrant@localhost ~]$ cd /var/www  # are the links there?
[vagrant@localhost www]$ ls -l
total 20
lrwxrwxrwx 1 root    root      16 Jan 11 21:24 cgi-bin -> /vagrant/cgi-bin
drwxr-xr-x 2 root    root    4096 Oct 16 10:49 cgi-bin-orig
drwxr-xr-x 3 root    root    4096 Jan 10 13:45 error
lrwxrwxrwx 1 root    root      13 Jan 11 21:24 html -> /vagrant/html
drwxr-xr-x 2 root    root    4096 Oct 16 10:49 html-orig
drwxr-xr-x 3 root    root    4096 Jan 10 13:45 icons
drwxr-xr-x 2 vagrant vagrant 4096 Jan 10 14:05 public
# Red links, so files do not exist
[vagrant@localhost www]$ ls -l /vagrant    #  html and cgi-bin not there
total 4
-rwxrwxrwx 1 vagrant vagrant 3112 Jan 12 13:46 Vagrantfile
[vagrant@localhost www]$
The vagrant package did not copy the stuff from the box, to the host. I probably had to do it with the explicit instructions in the Vagrantfile but forgot. For the time being, I will just copy the stuff from the previous directory in Cygwin's xterm:
$ pwd
/home/jkl/vagrant_Centos_6.6_lamp_updated
$ cp -r -p ../vagrant_contos_6.5-lamp/html .
$ cp -r -p ../vagrant_contos_6.5-lamp/cgi-bin/ .
And on the gust side, I will start the Apache
[vagrant@localhost www]$ sudo /etc/rc.d/init.d/httpd start
Starting httpd:                                            [  OK  ]
[vagrant@localhost www]$ ls -l   # What color are the links>
total 20
lrwxrwxrwx 1 root    root      16 Jan 11 21:24 cgi-bin -> /vagrant/cgi-bin
drwxr-xr-x 2 root    root    4096 Oct 16 10:49 cgi-bin-orig
drwxr-xr-x 3 root    root    4096 Jan 10 13:45 error
lrwxrwxrwx 1 root    root      13 Jan 11 21:24 html -> /vagrant/html
drwxr-xr-x 2 root    root    4096 Oct 16 10:49 html-orig
drwxr-xr-x 3 root    root    4096 Jan 10 13:45 icons
drwxr-xr-x 2 vagrant vagrant 4096 Jan 10 14:05 public
[vagrant@localhost www]$
So I tried to look at the Web page http://localhost:12080/cgi-bin/the_time_is_now again, and it seems to work now and even shows the right time:
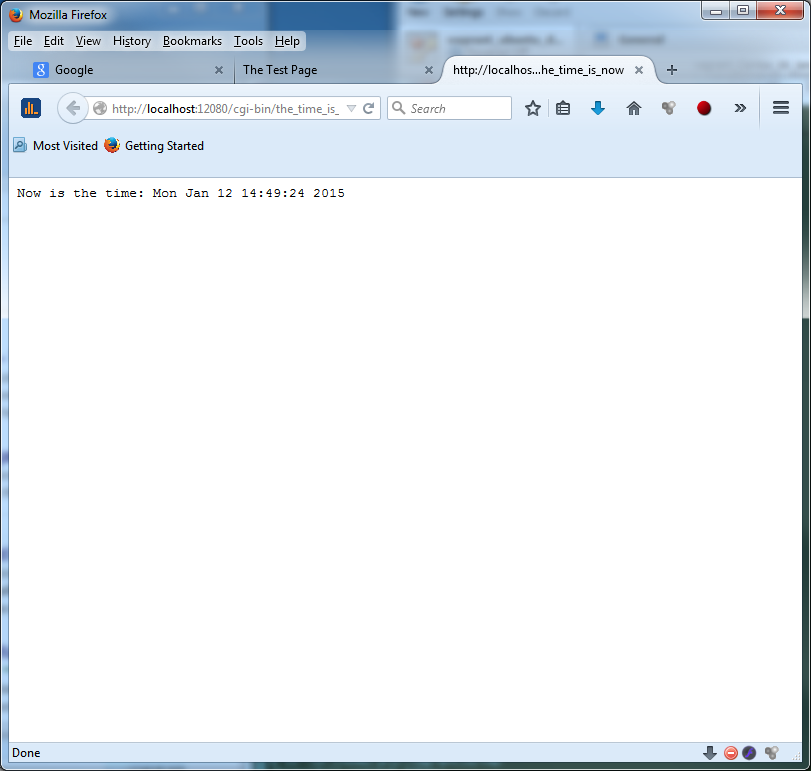
This brain dump starts to look like a book. So... What else
I can share here?. The X11 and ssh.
We were logging into the VM by using the command:
$ ls -l ~/.ssh
total 14
-rw-r--r-- 1 jkl None   45 Sep 27 23:05 config
-rw------- 1 jkl None 1679 Jun 15  2014 id_rsa
-rw-r--r-- 1 jkl None  393 Jun 15  2014 id_rsa.pub
-rw-r--r-- 1 jkl None 3190 Jan  6 19:19 known_hosts
So what I need to do is to append my Cygwin's
id_rsa.pub above to the authorized_keys
file on the guest. You can do it with an editor or
by using Unix shell:
WARNING:
When you are doing this, make sure that you made a backup
of authorized_keys and you are also logged into
your guest on some other terminal. If you mess up your
authorized_keys file on the guest you will not be
able to log into it with
ssh-rsc WWWCB3SzcC1yc2ECCCCDCQCBCCCBCQC7ppuqL2y9f+0wrr4I7Ofc6qjyss+lK80vu8UC+4+
9vhdbYeu/UhKyVMgL7uM/M8q5YESsyoOpS4DCS7TggjmHKjy/Sk3ejKJYr82YELKZdjKvvu9J/SIJe0
0uetoUP5TRORMvSqDTmO+ISWdlTsbtucCUGp/PIVJc3lUVh8P2CLUt4ogc6ldeCsBT1sHZ0VkTmfHjf
JDfwbSfzpgdqt0SYmLqd5kCqYIKB60Uth00CD0cPmoBr3svuBVSDHTF9KzsueRsGStUIyTyUcGPYwod
ZCzsjGi/cQUkj1t/rdcCKS+K6bEVFUqMPr4uGeBco1qciohMz4rjuTESBCP0FwC5 vcgrcst

ssh-rsc WWWCB3SzcC1yc2ECCCCDCQCBCCCBCQCp+f2g8+E2E4CUwtk9GFl8udU03PteOvhwpRshLpF
DqM617Z+H87jryDH3WEEucTqBZ6eWqmmTy5QLgyFcf1zQZUKekJ7D/bWUVv3tCBgqfJrVK1CsJrUKi6
6hu50uERTu8s1iEl7Vo4LQBWE0e0EwYCSCYK/9EdUS2zsLsQLkWEbr02mogsL4uqyEvLsSJYrj6KhJk
BWIMT7i0GX80hHwdJ6/9VZSnhl2ZvPgotT3O/Ezz8loRuurnmfHMND53kukg3ec82Cp9YmfcOoWNA6Q
xyCM11G/skPSVRHGQx8r1XOZ2ylwq3bpAV3Sr7pghxlREphRpV0PGWqP7clupY9R jkl@root-PC
Actually, I lied, it is not my file, these are faked keys...
Now (you are still logged in to the guest, are you?) try to
log in from some other terminal with
$ vagrant ssh
Last login: Mon Jan 12 14:38:55 2015 from 10.0.2.2
Welcome to your Vagrant-built virtual machine.
[vagrant@localhost ~]$
If you can do it, you did not mess up the authorized_keys file
on your guest. You can relax. If it does not work,
copy the backup authorized_keys over your mess-up
and see if you can still get in with
$ ssh -l vagrant -p 2222 127.0.0.1
The authenticity of host '[127.0.0.1]:2222 ([127.0.0.1]:2222)' can't be
established.
RSA key fingerprint is 84:0b:51:3a:3b:d7:71:b2:e3:ed:c9:e9:25:ed:7a:85.
Are you sure you want to continue connecting (yes/no)? yes
Warning: Permanently added '[127.0.0.1]:2222' (RSA) to the list of known hosts.
Last login: Mon Jan 12 15:56:35 2015 from 10.0.2.2
Welcome to your Vagrant-built virtual machine.
[vagrant@localhost ~]$ pwd
/home/vagrant
[vagrant@localhost ~]$ ls -l
total 12
-rw-rw-r-- 1 vagrant vagrant  19 Mar  7  2014 index.html
-rw-rw-r-- 1 vagrant vagrant 121 Jan 10 14:05 index.html.1
[vagrant@localhost ~]$ exit
logout
Connection to 127.0.0.1 closed. # We are back on Cygwin
$
Now, when you use the ssh again, it will not ask you for the confirmation since the guest was added to your Cygwin's ~/.ssh/known_hosts file. In my case I saw there the following entry at the end:
[127.0.0.1]:2222 ssh-rsa CCCCBsNzaC1yc2EAAABIwAAAQEArz4KK8gn4BjfMlKDs22blcscXW
SActWpkwWXFzssDaxovfVu2zdWz96wYI+Uzmh7sgIhCCc6I7z9CrcFNSC0MbzuCyGuyHcc2paxzpRno
ezss20xPu5R9xsdD2adNavo2ovlpPRulmox+S9Z9gU4CbsnGcJc4iLfr50uWZI98H7qtIfxotLWYrL7
O9syW/nVDztax09s+j6rwCoYa+2I9281FBfEsG+EzPcdSUi8VM9gu3J9Pe2VRK87fsiUgzpmQaVrfEB
yS2EZxeXsznKtogQp/36d6v2bjvE3ERjwAIOINT/aNrkGuI2RDOdAVRSivXHx23wiOmNQiSeqMrGEwQ
But do not copy it, since it is a fake. Now, in case you did not do it
before (I did not...
Oh... No... You need to create updated box again...). you need
to install some yum packages on guest.
You should do it when you are logged in to the guest:
sudo yum install xterm xclock xauth
or, if you want a full X11 environment (~100MBytes), do
sudo yum groupinstall "X Window System"
On the Cygwin side add the following to the
Vagrantfile in your Project Directory
between the lines
and
end
Just cut and paste the following:
  # X11 forwading enable
  config.ssh.forward_agent = true
  config.ssh.forward_x11 = true
now exit all your ssh connections and do vagrant reload in your project directory
$ vagrant reload
==> default: Attempting graceful shutdown of VM...
==> default: Clearing any previously set forwarded ports...
==> default: Clearing any previously set network interfaces...
==> default: Preparing network interfaces based on configuration...
    default: Adapter 1: nat
==> default: Forwarding ports...
    default: 80 => 12080 (adapter 1)
    default: 22 => 2222 (adapter 1)
==> default: Booting VM...
==> default: Waiting for machine to boot. This may take a few minutes...
    default: SSH address: 127.0.0.1:2222
    default: SSH username: vagrant
    default: SSH auth method: private key
    default: Warning: Connection timeout. Retrying...
==> default: Machine booted and ready!
==> default: Checking for guest additions in VM...
==> default: Mounting shared folders...
    default: /vagrant => C:/cygwin64/home/jkl/vagrant_Centos_6.6_lamp_updated
==> default: Machine already provisioned. Run `vagrant provision` or use the `--provision`
==> default: to force provisioning. Provisioners marked to run always will still run.
The easiest way to show the X11 applications from your guest on your host is to do the ssh X forwarding. There are many ways of doing this, but simply adding an -X option on the command line will do it.
$ ssh -X -l vagrant -p 2222 127.0.0.1
Warning: untrusted X11 forwarding setup failed: xauth key data not generated
Warning: No xauth data; using fake authentication data for X11 forwarding.
Last login: Mon Jan 12 15:58:20 2015 from 10.0.2.2
Welcome to your Vagrant-built virtual machine.
[vagrant@localhost ~]$ xterm &
[vagrant@localhost ~]$ xclock &
and you should see the xterm and xclock that are displaying in your X-Cygwin X server on your Windoz host.

The white stuff comes from guest and the other stuff is from Windoz (the green xterm is from Cygwin which is also Windoz)
If you think it is nonsense, let me know, so I correct it or scrap it. If you think that it was useful, share it with others on the blogs or add a link to your site. I will read it again one day, and maybe add some stuff, but it got much too long, and too quickly.
Jan Labanowski, Computational Chemistry List, Ltd.
jkl at ccl dot net